Monday 29 July 2013

Mushroom Dahi Tikka (Curdy-Creamy Barbecued Mushroom)


Mushroom Dahi Tikka (Barbecued Curdy-Creamy Mushrooms)
In a star lit night, sprawled on a mat getting  the wafting smell of mushroom and paneer being barbecued made me get up and check what my son was doing thus breaking my promise that I would not get up till I was served the food. I love the smoky taste of vegetables / chicken / fish / mutton cooked on charcoal. We call them paneer / mushroom/ chicken/mutton/fish Tikka. With Red wine and garlic bread mushroom and paneer tikka make healthy, non-oily delicious and complete food. I do not like overpowering the delicate flavor of mushroom with any strong sauce.Charcoal barbecue apparatus can be purchased  for using indoor and of course out for picnic, just carry raw material and some charcoal, stop when hungry,  look for four big stones they will make the perfect barbecue pit.

Preparation Time: 30 min.
Cooking Time 30 min
Servings: 8 large servings

Ingredients Required For Mushroom Tikka:
  • 500 gm. Button Mushroom
Mushrooms
  • 200 gm. Thick curd
Thick Curd
  • 1 tea spoon Cream (Optional)
Cream
  • 1/2Teaspoon Red Chili Powder
  • 1 Tea spoon garlic paste
Garlic Paste
  • 1 Tea spoon Ginger paste
Ginger Paste
  • 1 tea spoon Coriander Powder
  • Salt to taste
Directions For Making Mushroom Tikka:
  • Soak Mushrooms in water for 10 min to remove all dirt sticking to the surface.
  • Towel dry the washed mushrooms.
  •  In a big bowl mix
    • Thick curd
    • Garlic paste
    • Ginger paste
    • Red chili powder
    • Coriander powder
    • Cream (Optional)
  • Mix all ingredients nicely till smooth and homogenous mixture is made. Marinade for Curdy barbecued mushroom is ready.
Marinade for Mushrooms
  • Dip each cleaned and dry mushroom in the marinade and carefully keep in a bowl. Repeat the same with all mushrooms.
  • Pour the remaining marinade on the top of mushrooms.
  • Cover and keep for 10-15 min.
Mushrooms marinated in curd marinade
  • Take a clean skewer and carefully put the marinated mushrooms on the skewer, entering the skewer from stalk and exiting from head of the mushroom.
Marinated Mushrooms on skewer before being barbecued
  • Make sure there is at least one centimeter space between two mushrooms.
  • Place the skewer with marinated mushrooms above the red hot charcoal and let them cook till they start getting tender. Keep turning the skewer with mushrooms on the charcoal to ensure uniform cooking.
Skewer with marinated mushrooms being barbecued on hot amber 
  • It will take not more than 3-4 min for one skewer mushrooms to get barbecued.
Mushrooms barbecue
  • Remove hot barbecued mushrooms from skewer and serve piping hot with coriander mint chutney and chilled wine.
Mushroom Dahi Tikka (Curdy-Creamy Barbecued Mushroom)
To enjoy the heavenly taste of Mushroom Dahi Tikka to the fullest avoid strongly flavored spicy sauces with Curdy-Creamy Mushroom.
 Tips:
  • Bigger the size of mushrooms better the final result as big size mushrooms are easy to skewer and barbecue.
  • To avoid juices of mushrooms leeching during marinating,salt can be added to mushrooms after they have marinated just before skewering them.
  • Do not marinate the mushroom for longer time.
  • Do not barbecue the mushroom for too long they will lose the juices and will become chewy.
  • Delicate and careful handling of mushroom is a must else they will break while skewering.
  • Always serve piping hot. Do not barbecue and keep for later use as reheating will make the mushrooms go limp, chewy and the taste will not be good.
Suggested variations:
  • 2 cm. pieces pf capsicum, red and yellow pepperoni (Bell pepper) can be marinated with mushrooms,skewered between two mushrooms and then barbecued.
  • If you like smokier flavor then burn a piece of wood with charcoal just before keeping the skewer with mushrooms on the charcoal.
  • Just before taking the cooked mushrooms from barbecue sprinkle some herb of your choice on the charcoal and let the mushrooms absorb the flavor for 20-30 seconds, then remove them from barbecue. The wonderful smell of herbs will seep into barbecued mushrooms.

Moong Sprout Ki Sabji (Indian Dry Savory Of Sprout Green Gram)


Sprout Moong Dal Ki Sabji (indian Savory Of Sprout of Green Gram)

Any whole grain when sprouted becomes easier to digest as well as more nutritive because the sprout on the seeds are rich in vitamin B and Vitamin C. Moong dal is very light to digest and thus after sprouting it not only becomes more easy to digest but very nutritive. Sprouts are very good for growing children, pregnant women, and any person recuperating from illness. In Indian especially in Maharashtra sprouts are integral part of food.
Savory of moong sprouts with very little oil and mildly salted and spiced is absolutely delicious and when accompanied with soup and salad makes a complete light, low calorie fat-less meal. The savory can be had for snack with a dash of lemon.
Preparation Time: 5 min
Cooking Time: 5 minutes
Servings: 4 Large Servings
Ingredients Required For Making Moong Sprout Sabji (Indian Savory of Sprouted Whole Green Gram):
  • 150 gm. Whole Green Gram (Moong Dal)
  • 5-6 Curry Leaves (Kadi patta) (optional)
  • 1 Teaspoon Cumin Seeds
  • 1/2Teaspoon Mustard seeds
  • 2 Green Chilies
  • 1/2Lemon
  • Salt to taste
Direction For Making Moong Sprout Ki Sabji:
  • Wash the sprout in flowing water.
Washed Sprouts
  • Remove the seeds from the green chilies and cut them to small pieces.
  • Heat oil in a pressure cooker and when the oil is smoking hot lower the flame and add mustard seeds.
  • When the mustard seeds have spluttered add cumin seeds and pieces of green chilies. Let the cumin seeds splutter and green chili pieces change the color.
  • Add washed sprouts and mix nicely.
  • Add turmeric powder and salt.
Sprouts In Seasoning
  • Mix nicely and close the lid of cooker.
  • Bring the flame to high and cook till pressure is built in the pressure cooker.
  • Put the weight (Whistle) and lower the flame.
  • Cook for 2-3 min. after pressure is built and then remove the cooker from heat.
  • Allow the cooker to cool.
  • Sprouts will keep on cooking by the heat under pressure when the cooker is allowed to cool.
  • Mix the cooked sprouts and take out the cooked sprouts in a serving bowl.
  • Squeeze the lemon and sprinkle the juice on the sprouts.
  • Garnish with coriander sprigs (Cilantro) and fresh green chili.
  • Serve hot as side dish to main course or with soup and salad as main course.
  • Serve with some besan ki sev and finely cut onion and tomato as snack.
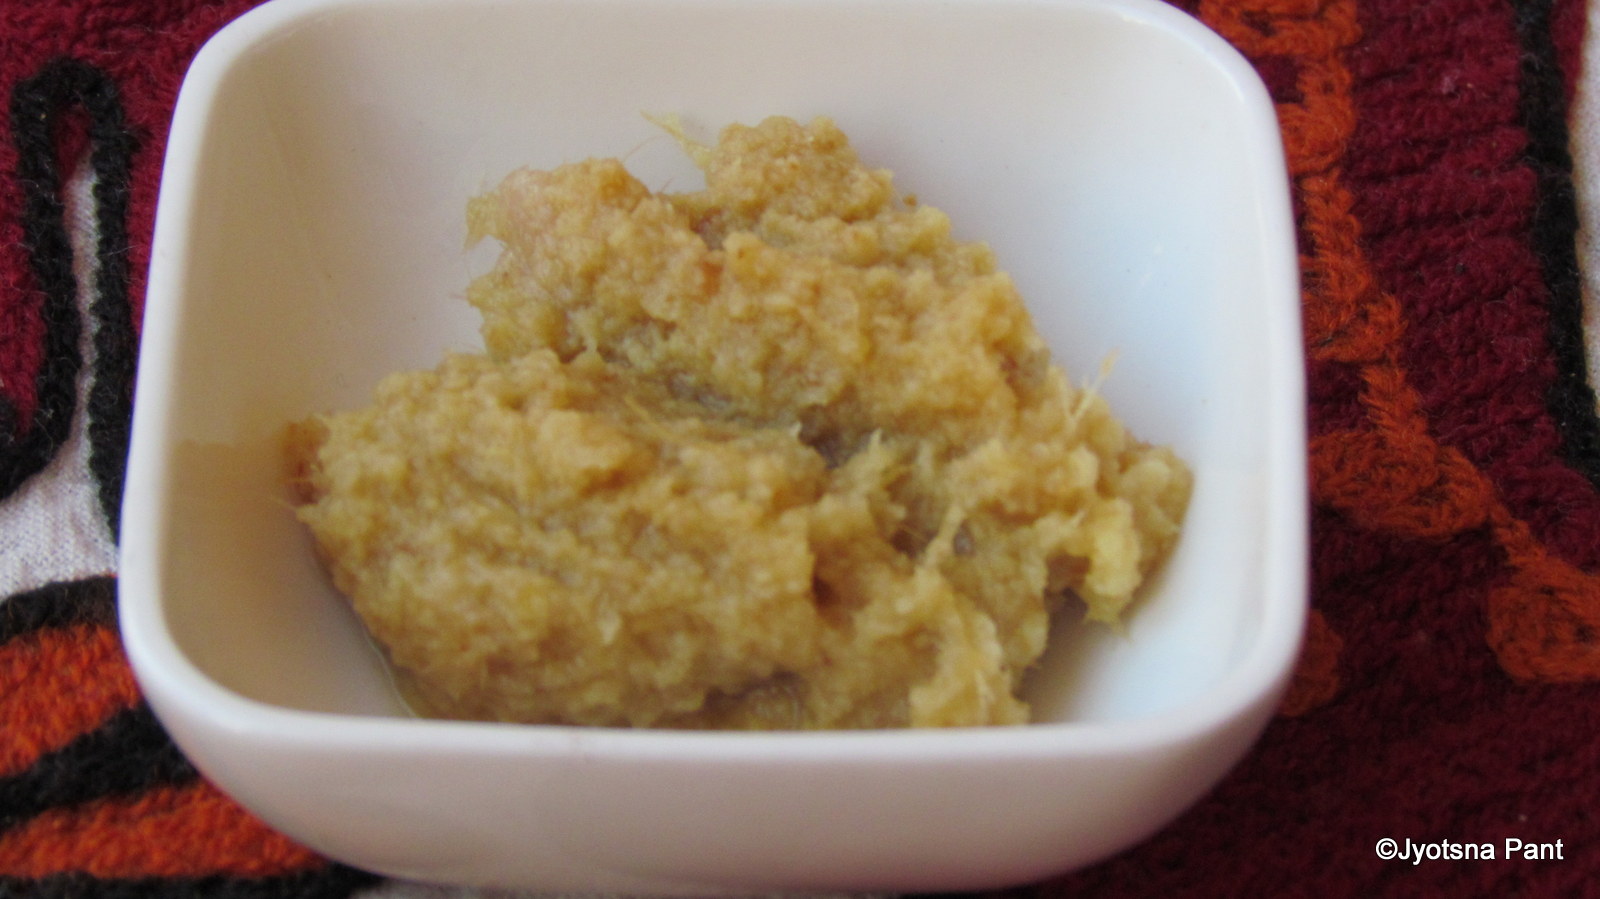
Moong Sprouts Ki Sabji
Tips:
  • Always wash sprouts before use.
  • Sprouts should not be over whelmed with strong spices. If done so the delicate flavor of sprouts will be lost.
  • Lemon juice should be added only after cooking not while cooking, if lemon juice is cooked along with food it leaves bitter taste, thus spoiling the taste of food.
  • Do not cook sprouts for long time in cooker; over cooked sprouts do not taste good.
  • Always taste green chilies for hotness before adding and then change the amount of green chilies as per requirement.
Suggested Variations:
  • Mixture of Matki /Moth/Mat/dew beans/Turkish beans, सबूत मसूर /Black lentil/lens culinaris, yellow peas, black gram can be mixed with green gram before soaking, the Sprout of this mixture is extremely tasty and healthy. 
  • Sprouts can be cooked in wok instead of cooker. Time taken for cooking will change from 10 min. to 15 min.
  • Amchur powder can be added instead of lemon juice.
  • 1 finely cut tomato can be added to the oil after the cumin seeds have spluttered, and then sprouts can be added and cooked.
  • To the seasoning add finely cut one onion and cook till transparent. Add finely cut one tomato and cook till soft and then add sprouts and cook till soft (10 min. in wok and 2-3 min. in pressure cooker after the weight is placed)

Tuesday 23 July 2013

How to Make Good Sprouts From Whole Green Gram (Sabut Moong)


Sabut Moong Sprout (Sprout of Whole Green Gram)

Sprouting whole pulses is an easy job. It is extremely rewarding as least amount of effort result in most nourishing, healthy and tasty sprout which can be used in salad/ made into dry or gravy savory. Sprouts with a dash of lemon, pepper and salt are very good for breakfast as they provide the nutrients required the whole day. Once the pulses sprout they become very rich in vitamin C and A apart from the proteins they have. I love sprout moong just to snack on. Try the sprout without salt or any other additive they taste great.

Preparation Time: 3-4 hours (Soaking time)

Time for sprouting: 2 days

Serving Time: 4 Medium Servings

Ingredients Required for Sprouting Moong Dal:
  • 100 gm. Sabut Moong Dal (Whole Green Gram)
  • Water
  • Cloth piece/ Cloth bag / netted plastic bag
Directions For Sprouting Sabut Moong Dal:
  • Clean sabut moong dal (Whole green gram), wash nicely and drain the washed water.
  • Soak cleaned washed moong dal in excess of water for 3-4 hours.
  • The dal should swell and become soft.
  • Drain all water and place the soaked dal in cloth piece and tie the dal in cloth piece making a loose bag or place the soaked dal in a plastic net bag or place them in a cloth bag.
  • Place the bag with soaked dal in a container / big bowl and cover so that the heat does not seep out.
  • Keep the bag with soaked dal undisturbed for 12 hours.
  • The green cover of the dal will have split and dal will start showing signs of sprouting.
  • Pass water through the bag so that all dal gets hydrated.
  • Let the excess water drain and again place the bag with dal in the container and cover.
  • Dal will sprout with the size of sprout almost 2 mm. 
Sabut Moong Sprout (Sprout of Whole Green Gram)
  • This sprout can be had in salad and mixed with yoghurt.
  • Sprout is best and most nutritive when the size of sprout is at least 2 cm. long. To allow them to grow more, sprinkle some water and keep the bag with sprouted dal in the container for 10-12 hours.
Sprouts after 2 days of Sprouting the Whole Green Gram (Sabut Moong Dal)
  • Remove the sprout and wash in flowing water.
  • Drain and keep in an airtight container in the fridge and use as and when required.
  • This sprout can be kept in fridge for a week also. Keep washing them and draining them once in two three days.
  • Sprouts remain fresh and keep on growing with small speed in fridge also therefore if one wishes the sprout after 12 hours of sprouting can be kept in fridge for 10-12 days also only care to be taken is that every 24 hours they should be washed and drained of excess water and again stored in the fridge.
Tips:
  • Sometimes dal does not get soaked completely some dal seeds remain unsoaked; remove those dal seeds before keeping for sprouting.
  • In summers (40oC and above) the dal while sprouting becomes dry due to heat thus sprinkle water every 12 hours to keep it moist.
  • In rainy weather when the humidity is high and temperature is 30-35oC chances of dal getting spoiled are quite high thus it is necessary to wash the dal kept for sprouting every 12 hour, drain the water and keep for sprouting again.
  • Never keep water with dal while sprouting. Dal requires moisture not excess water for sprouting.
  • Remember seeds grow under the earth thus the correct condition for sprouting are:
    • Moisture
    • 35-38C Temperature
    • Darkness
Suggested Variations:
  • Mixture of Matki /Moth/Mat/dew beans/Turkish beans, सबूत मसूर /Black lentil/lens culinaris, yellow peas, black gram can be mixed with green gram before soaking, the Sprout of this mixture is extremely tasty and healthy. 
  • If you do not want to keep the soaked dal for sprouting in bag then you may keep it in a container with insulation so that moisture, darkness and temperature can be maintained.
  • The same process can be employed for sprouting Black gram, or any whole seed you wish to sprout.

Monday 22 July 2013

Matar-Mast Patta Gobhi (Cabbage-Pea Indian savory)


Matar-Mast Patta Gobhi (Cabbage-Peas Vegetable)
Cabbage is rich source of sulfur, dietary fibers, iodine and vitamins. The only thing which goes against it is the salt content in it. But that is counteracted by adding less salt in the vegetable. I cannot think of the reason why cabbage cannot be enjoyed in various forms of savory preparation and as stuffed parantha. I love adding the tender central leafy portion of cabbage to my salad. Green peas apart from adding a distinct flavor to the cabbage savory also add color to it thus making it not only tasty but attractive to look at, and I am a firm believer of good appearance and smell of food. One very important thing to be remembered is that cabbage savory should never be over spiced and garnished because this will over shadow the flavor of cabbage completely.

Preparation Time: 30 min (If fresh pea pods are being used)
Cooking Time: 30 min.
Servings: 6 large Servings

Ingredients Required For making Matar-Mast Patta-Gobhi:
  • 500 gm. Cabbage
  • 250 gm. Shelled Peas ( 500 gm. Fresh Pea Pods)
  • 1 Teaspoon Cumin Seeds
  • 1/2 Teaspoon Mustard seeds
  • 2 Green chilies
  • 2-3 ml. Olive oil / any cooking oil
  • Salt to taste
Direction For Making Matar-Mast Patta-Gobhi:
  • Cut cabbage (Patta-Gobhi) to long thin pieces.
Long Thinly Shredded Cabbage
  • Shell pea-pods.
  • In a pot take 250 ml. water and a teaspoon salt and boil. When the water comes to boil add the shelled peas and allow the peas to boil for one minute.
  • Remove from heat and sieve the parboiled peas. Keep the par-boiled peas aside; discard the water used for boiling.
  • Wash the cut cabbage in excess water and then drain water from cut and washed cabbage.
  • Take a thick bottom wok and heat oil in it on high flame.
  • When the oil is smoking hot reduce the heat and add mustard seeds, the seeds will splutter.
  • Add cumin seeds and green chilies. Allow the cumin seeds to splutter and green chilies to cook for I min.
  • Add cabbage in the seasoning and mix nicely.
  • Cover and cook for 3-4 min with occasional stirring and turning the cabbage to ensure even cooking.
Cabbage cooked with seasoning for 3-4 min.
  • Add salt and turmeric powder and mix nicely.
  • Cover and cook for 2-3 min.
Ready for Shelled/preserved Par-Boiled Peas to be added
  • Add par boiled peas and mix.
  • Cover and cook for 5 min. with occasional stirring.
  • Remove the cover, bring the heat to maximum and cook with continuous stirring to dry any juices of vegetables left in wok.(it will take less than one minute).
Ready To Be Served
  • Remove from heat. Take out in a serving bowl and garnish. I prefer it without any garnishing, because the smell of peas in cabbage is too good for me to overshadow with any herb.
Matar-Mast Patta Gobhi Cabbage-Peas vegetable)
Tips:
  • Cabbage is the vegetable I prefer washing after cutting reason being that any pesticide sprayed gets trapped between leafs while the cabbage is growing. Thus one has to get rid of it before cooking.
  • Another way of removing the pesticide is remove each and every leaf and then those leafs should be washed in flowing water then cut. This makes the work tedious.
  • Never add salt right in the starting. This will cause the cabbage to lose the juices and go limp. Do you want the vegetable crisp and juicy or limp?
  • Par-boiling and then adding the peas will retain the lovely green color of peas.
  • Do not add too much spice (Chili, salt, garam masala) as the sweetness of peas and cabbage is lost.
  •  Always taste the green chili for its hotness and then depending upon its hotness increase / decrease the amount of green chilies.
Suggested Variations:
  • 1/2Teaspoon amchur can be added just before removing from wok.

LinkWithin

Related Posts Plugin for WordPress, Blogger...