Sunday 29 September 2013

Rajasthani Bharwa Hari Mirch /बेसन भरी हरी मिर्च (Stuffed Green Chilies)


Besan Stuffed Green Chilies


Besan (Black Gram Flour) Stuffed Green Chili
Big fat green chili serves varied purpose in Indian culinary. Make pakodas, cut and add to salad to give lovely flavor, Make pickle out of them with lemon and ginger or make stuffed vegetable. Each and every above said variation is mouthwatering. I love the vegetable made by stuffing it with besan. The chili stuffed with besan lasts in the fridge for 10-15 days also. As a side dish it is one of my favorite. I prefer making changes according to my taste, and this recipe is a fine example of it. In Rajasthan potatoes are not added and the chilies are much more than I prefer. So this is my version of Rajasthani Bharwa Mirch.

Preparation Time: 10 min.
Cooking Time: 40-50 min
Servings: 10-15 Chilies

Ingredients Required for making Stuffed Green Chili:
  • 250 gm. Big fat Green chilies
  • 150 gm. Besan (Gram flour)
  • 3 Medium size Potatoes
  • 1 Teaspoon Red chili Powder
  • 1 Tea spoon Garam masala
  • 100 gm. Onions (2 medium size onions)
  • 4-5 Cloves of Garlic
  • 2-3 cm. Piece of Ginger
  • 1/2 Tea spoon Turmeric
  • 1 Tea spoon Amchur (Dry raw mango powder)
  • Salt to taste
  • 25 ml. Cooking oil
Direction for making Stuffed Green Chili:
  • Wash the chilies and towel dry them.
  • Remove the stalk from the chili slit them lengthwise from one side keeping the other side intact.
  • Carefully Remove the portion holding seeds and discard.
Green Chilies Cleaned and slit from one side De-seeded
  • Peel and cut the onions very fine.
  • Peel and cut garlic fine.
  • Grate the ginger.
  • Boil the potatoes.
  • Peel and mash the potatoes to small pieces.
  • Roast the besan in a thick bottom wok till it starts giving out nice smell and the color changed to very light brown.
Roasted Besan (Black gram flour)
  • Heat 5 ml. oil in a thick bottom wok till smoking hot.
  • Add mustard seeds and cumin seeds.
  • When the seeds have spluttered then add finely cut onions and lower the flame.
  • Add onions to the seasoning and cook on low flame till transparent (Approximately 4-5 min.).
Onion cooked to transparent state
  • Add finely cut garlic and grated ginger and cook with continuous stirring till garlic gains brownish pink color.
  • Add roasted besan and mix nicely.
  • Cook for 2 min. only with continuous stirring.
Onion and roasted besan cooked for 2 min.
  • Add boiled mashed potatoes and mix.
Boiled Mashed Potatoes added to the besan onion mixture
  • Add
    • Salt
    • Red chili powder
    • Turmeric powder
    • Amchur powder (Dried raw mango powder)
    • Garam masala
  • Mix nicely so that the spices get mixed uniformly.


Spices added to roasted besan Potato mixture
  • Sprinkle 20 ml. water and mix.
  • Cover and switch off the gas.
  • Let the filling cool in the wok. The flavor of spices will mix nicely in the filling and the filling will remain moist.
Filling ready for stuffing the Green chilies
  • When the filling comes to room temperature, stuff each green chili with the filling. Keep pressing the filling while stuffing the chili.
  • When all chilies are stuffed wrap each chili individually with thread so ensure the filling does not come out during cooking.
Green chilies stuffed with besan filling and wrapped with thread
  • Take 15 ml oil in a thick bottom wok and heat it.
  • When the oil is hot put stuffed chilies one by one in the oil.
  • Lower the heat and give a gentle stir so that oil gets coated on all sides of all chilies.
Stuffed Green Chilies put in hot oil
  • Cook on low flame for 2 min without covering and turn the chilies gently.
Oil coated on all chilies and being cooked on low flame
  • Cook for 2 min. more without covering and then sprinkle 4-5 ml water and turn the chilies.
  • Cover and cook for 5 min. with occasional turning of chilies.
  • Turn the chilies, cover and cook for 10 min on low flame again.
  • Remove the cover and cook with turning on high flame for just two min.
  • Stuffed green chilies are ready to be served.
Spicy Stuffed Green Chilies waiting to be served
  • Remove the thread wrapping before serving.
  • If you do not want tyo go through the hassel of wrapping and unwrapping the thread from the Bharwa mirch then cook it on the Non-stick tawa (Non-stick iron plate) it will require just 1 ml. of oil and even the exposed side of mirch can be made crisp and brown.
Bharwa Mirch cooed on Tawa
  • Enjoy besan stuffed green chilies in any meal with whatever you like it goes well with almost everything.
Besan Stuffed Green Chilies
Thread wrapping removed before serving
Tips:
  • Make sure the chilies are slit from only one side the other side should be intact.
  • Besan (Black gram flour) should be roasted on low flame to get the correct state of roasting, high lame roasting can cause burning of besan.
  • Take care while turning the chilies else the stuffing may spill out.
  • Do not sprinkle too much water. Water is sprinkled to maintain moisture in the stuffing.
Suggested Variations:
  • If the chilies are very fat then instead of side slit they can be cut from the top and the seed can be removed from the top. Once the stuffing is done then the cap removed from the top can be gently inserted in the stuffed chilies. Wrapping with thread will not be required.
  • Potatoes can be replaced with coarsely ground and soaked Nutrela (coarse powder of chunks of soya beans). If stuffing is prepared without potatoes then the chilies can last for a month also in the fridge without getting spoiled.
  • Finely cut green chilies, coriander sprigs can be added to the stuffing.
  • Capsicum can be taken instead of fat thick green chilies.

Monday 23 September 2013

How To Make Good Jeera Powder(Cumin Powder)


Jeera Powder
Jeera (Cumin ) is a very useful condiment. It has tremendous medicinal values, which is  why in India cumin seeds are used in almost every dish for seasoning. Cumin powder when added to chas (Butter milk) it enhances the taste, flavor and the digestive property of chas. Cumin powder is used in Dahi vada and many other chaat in North India. The taste and flavor of cumin powder is lost if it becomes old. Spices powder made at home is pure, fresh therefore retains the flavor, taste and aroma. I prefer making my own spices powder and keep them for a month or so by the time they finish off. I do value the importance of unadulterated food items.
Preparation Time: 20-25 minutes
Servings: 100 gm. Powder
Ingredients Required For making Cumin Powder:
  • 100 gm. Cumin seeds
  • 2-3 Kashmiri mirch
  • 1 Tea spoon Crystal salt / Powder salt
Directions For Making Jeera (Cumin) Powder:
  • Clean cumin seeds.
Cumin Seeds
  • Remove the seeds from red chilies
  • Heat a thick bottom wok and roast cumin seeds and red chilies on low flame with continuous stirring till seeds are light brown in color.Cumin seeds will start spluttering. (Very light Brown color)
  • Cool the roasted cumin seeds and chilies.


Roasted Cumin Seeds
  • Add salt and grind to fine powder.
  • While grinding the oil of cumin seeds is leeched (Comes out) due to this the powder starts sticking at the bottom of grinder / Mixer pan, switch off the grinder and with the help of a spatula / spoon scrape the powder off the bottom of the pan and turn it upside down and grind again.
  • Repeat till fine powder is formed.
  • Sieve and keep the fine powder separate in a airtight container.
  • Do not throw the small solid particles left after sieving. They can be made to paste with onion and garlic and can be used to make gravy for vegetables/ chole / rajma/ chicken / mutton.
Tips:
  • Salt and chilies are added to ensure cumin powder to be fine. So taste the chilies before adding, they should not be too hot.
  • Do not roast the cumin seeds too dark in color this will cause the essential oil of cumin seeds which give flavor and taste to evaporate, thus making the powder with less aroma and bad taste.
  •  Roast the cumin seeds always on low flame with continuous stirring.

How To Increase Shelf life of Green Chilies

De-Stalked Green Chilies and The removed Stalks
Green chilies are integral part of Indian cooking thus a must commodity in the kitchen. Problem comes when you take them out from fridge and find that they have rotted away when you were assured of their presence in the fridge. The main reason of cilantro (Dhaniya), mint, Palak, Methi, Green chili rotting while being stored in fridge is dirt and moisture. In case of green chilies even when cleaned chilies are stored they rot soon, this is due to the stalk of green chilies.I found that when green chilies are store in proper way they last for almost 15 days in the fridge. Hope my friends to benefit from my this experiment and are spared the letdown feeling when they want fresh green chilies. and get rotted one from fridge.

Time for Storing: 30 minutes
Shelf Life: Minimum 15 days

Material required For proper storing Of Green Chilies:
  • Green Chilies
 Green Chilies
  • Water
  • Cotton Cloth / Towel
  • Old News paper
Direction For Proper Storing Of Green Chilies:
  • Take healthy fresh undamaged green chilies.
  • Remove the stalk from green chilies carefully without damaging the green chilies. Discard the stalks.
De-Stalked Green Chilies and The removed Stalks (To be discarded)
  • Wash green chilies in plenty of water.
  • Dry the De-stalked and washed green chilies with cotton cloth / towel.
  • Allow the wash dried chilies to stand in shade at room temperature for 20-30 min.
  • Wrap the green chilies in a newspaper and place the packet in a cotton bag.
  • Keep the bag with the packet of green chilies in the fridge.
  • Chilies will remain fresh for 15-20 days.
  • Enjoy the freshness of green chilies, bonus you do not have to wash them every time you want to eat them.
Tips:
  • Make sure the green chili body is not damaged. Damaged body rots fast.
  • Chilies should be completely dry before storing.
  • For longer shelf life while wrapping the green chilies in paper, first place few chilies, fold the paper, again fold the paper so that there is paper between one layer of washed, dried chilies in the packet

Low Oil Sprout with Gravy (Indian savory Of Sprout)

Sprout With Gravy (Indian Savory Of Sprouts)
Sprouts have their own taste and if seasoned too much with spicy and made in too much oil it loses its all nutrients as well as taste. In Maharashtra sprouts are made either dry or with gravy. When the one with gravy is paired with finely cut onions, tomatoes, besan ki Sev and pav it is called Missal –Pav, one of the specialties of Maharashtra. This savory can be enjoyed with roti/parantha/Bhakari(Indian bread of Millet) or Pav (Unleavened bread).

Preparation Time: 10 min.
Cooking Time: 10 min
Servings: 5-6 large helpings.

Ingredients Required or Making Sprout Vegetable with Gravy : (Cup measurement is by 150 ml. tea cup)
  • 2 Cup Moong sprout /Sprouts of 100gm. Whole Green Gram (Sabut Moong)
Moong Sprouts
  • 1 Tea cup finely cut Onion 
Finely cut Onion
  • 1 Cup finely cut Tomatoes
Cut Tomatoes
  • 3-4 Green Chilies
Cut Green Chilies
  • 2-3 cm. Ginger
  • 1 Teaspoon Kasoori Methi (Dried leafs of Methi)
  • 5-6 Kadi patta 


Kadi Patta (Curry Leafs)
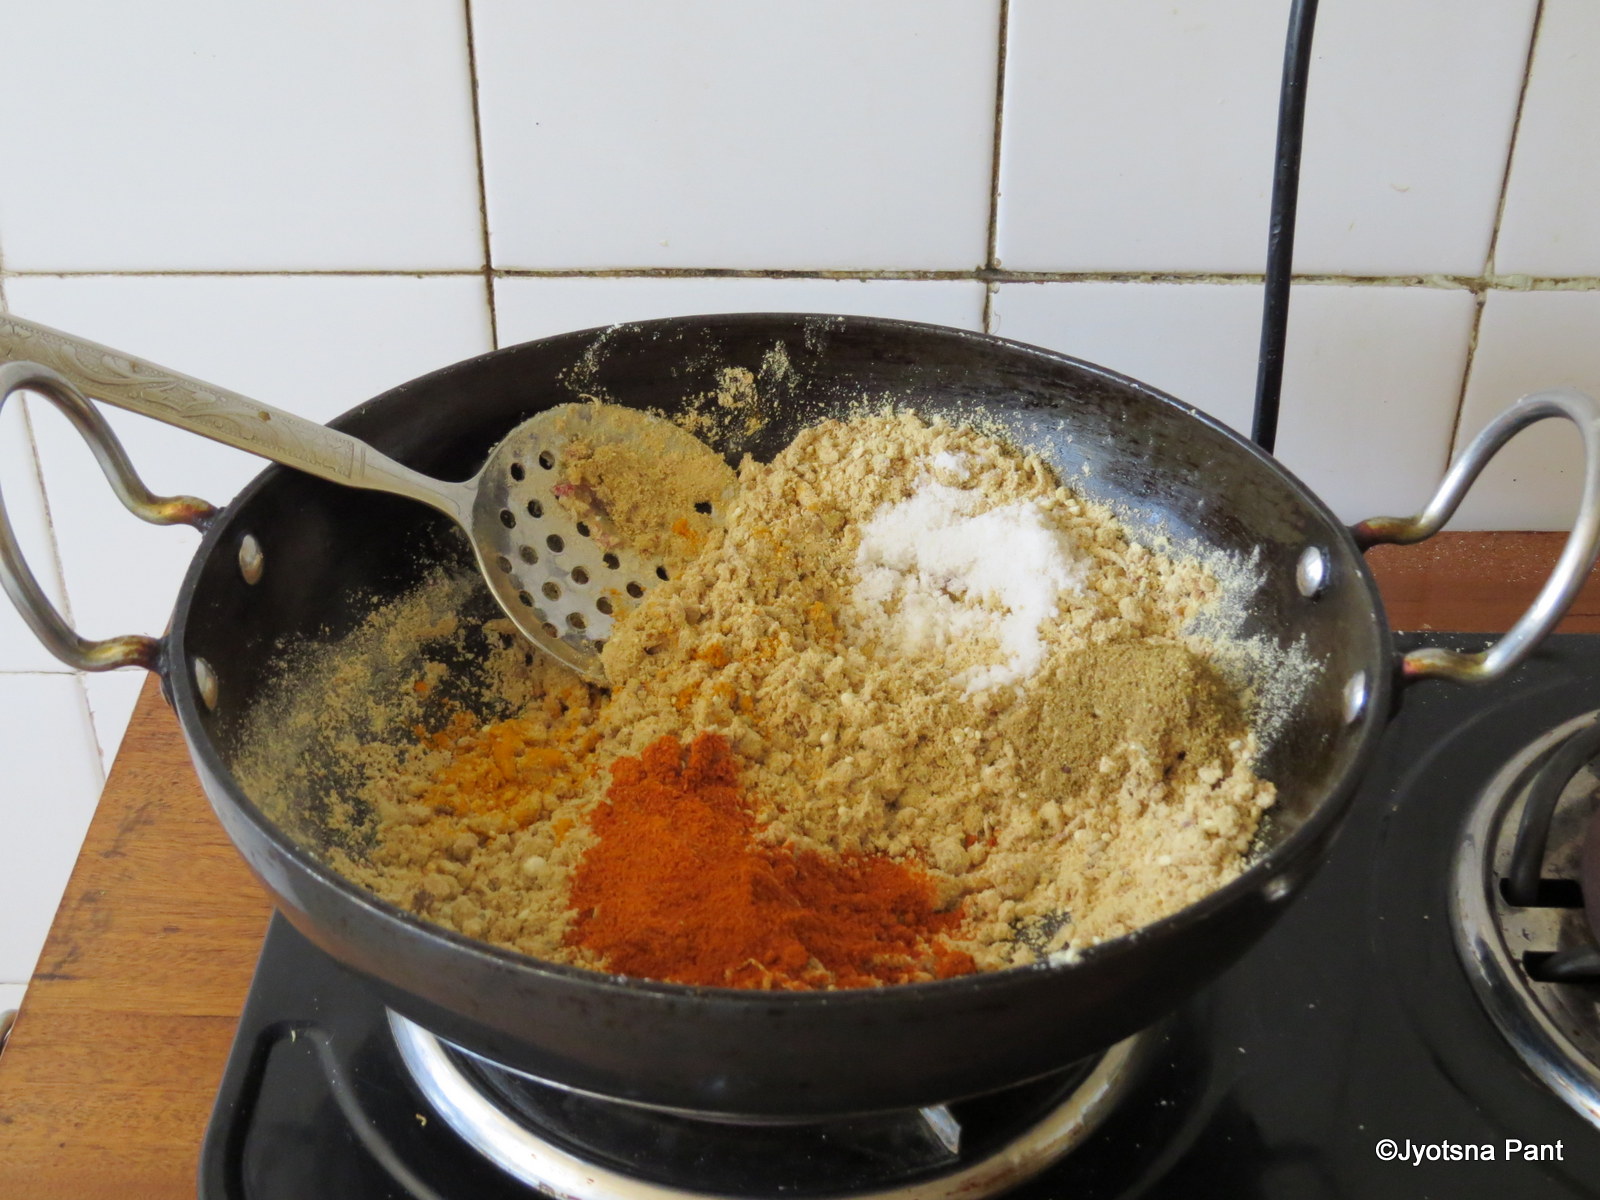
  • 1/4Teaspoon Turmeric powder
  • 1 Tea spoon cumin seeds
  • 1 tea spoon Olive oil/Any cooking oil
  • Salt to taste
Direction For Making Moong Sprout Vegetable with Gravy:
  • Wash the sprouts and keep aside.
  • Grate Ginger.
  • Heat one teaspoon oil in a wok till smoking hot, Lower the flame and add
    • Cumin seeds
    • Kadi patta
    • Green chili pieces
    • Grated ginger
  • When the seeds have spluttered and the color of curry leafs and green chili pieces change (It will take less than one min,) add finely cut onions.


1 ml. Oil being Heated
Onion being sauteed with Seasoning
  • Cook on low flame till they turn transparent not golden brown.
  • Add
    • Finely cut tomatoes
    • Turmeric powder
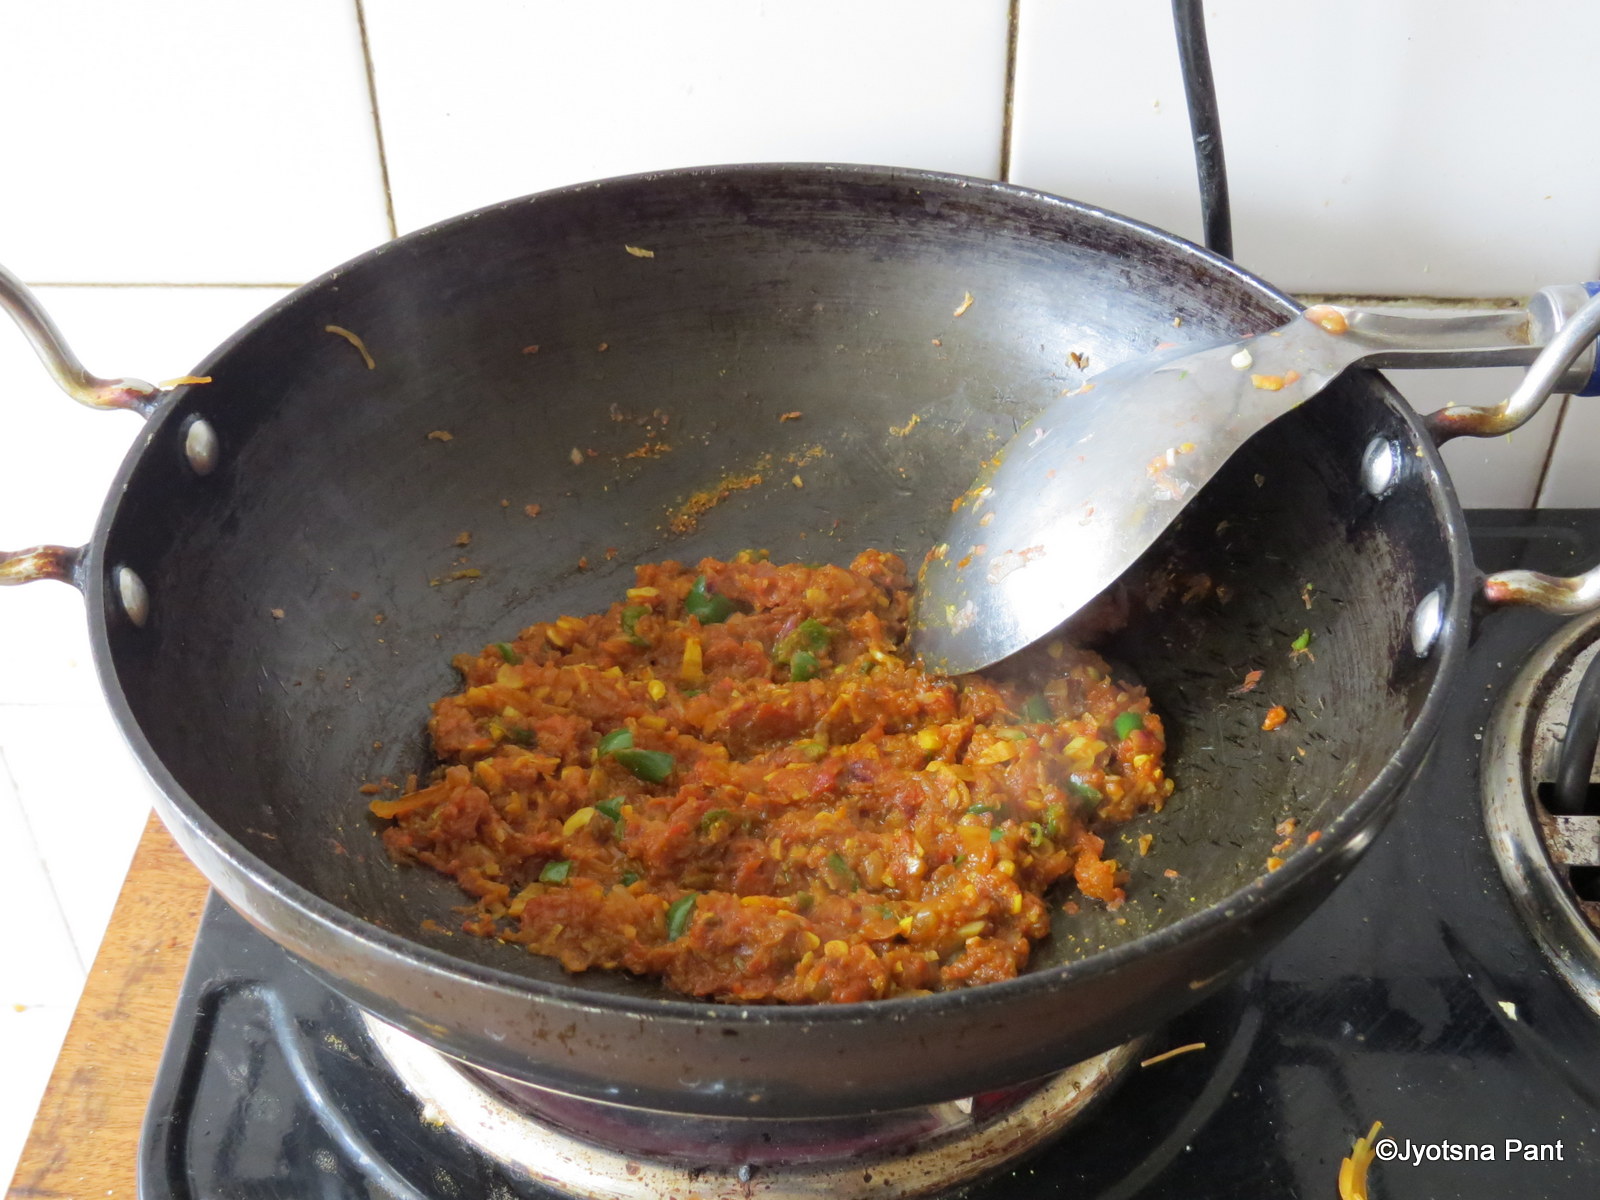
    • Salt and cook on low flame till the tomatoes become soft and the mixture starts leaving the edges of wok.


Masala Ready For Sprouts to be Added
  • Add sprouts and cook for 2-3 min. only with regular stirring.
Sprouts added and Being Cooked On Low Flame
  • Add 300 ml. water and bring the flame to high.
Water Added and Flame Brought to High
  • Give one boil add kasoori methi mix and cover. 
Kasoori Methi Added
  • Switch off the gas and let it stand for 10 min.
Sprouts Savory
  • Take out in a serving Bowl and serve hot sprout vegetable with roti/parantha/Jowar or bajara Bhakri/pav.
Sprouts Savory
  • Add 4-5 tea spoons of Besan ki Sev. Top it up with1-2  finely cut onion and 1-2 tea spoon tomato. Wedge of lemon and a green chili. Your Missal is ready. Serve it with Pav. 
Tips:
  • Never cook sprouts too much its nutrients get destroyed and it becomes hard and chewy.
  • Taste the green chilies before adding as the hotness of chilies changes with the different variety.
  • Check for the spiciness of vegetable before adding red chili powder.
  • As Kasoori methi is added thus Cilantro (Coriander leaves) are not required for garnishing.
Suggested variations:
  • Mixture of Matki /Moth/Mat/dew beans/Turkish beans, सबूत मसूर /Black lentil/lens culinaris, yellow peas, black gram can be mixed with green gram before soaking, the Sprout of this mixture is extremely tasty and healthy. 
  • If you do not wish to put onions then 2 teaspoon of coriander seeds (Dhaniya powder) should be added once tomatoes are cooked. Do not put coriander seeds powder directly to the oil.
  • 10-15 seeds of ground nut can be roasted, and crushed coarsely after removing the peel and added just before serving to add crunchyness.
  • Cilantro (Coriander leafs) can be taken for garnishing, but if cilantro is being used avoid kasoori methi.
Finely Cut Cilantro
  •  Matki, or any other sprouts can be made the same way.

Monday 16 September 2013

Ras and Gude/रस और गूदे (Uttarankand's Thick Black Soup and savory Of Whole Pulses)


Ras with Rice and Gude
Ras

 Ras in Hindi as well in Kumaoni language means juice. No other name could have been better than Ras which is a thick black color soup made from the mixture of whole pulses available in Uttarankahand in some parts (Pithoragarh) it is called Chudkani. The high light of this savory are the black and brown flat grams available in Kumaon.  These are known by the name of Bhatt (Black) and Gahat (Brown/ reddish brown). Gahat is available in Maharashtra also and is called Hulga. Since Ras has lots of different whole pulses thus it has almost all type of proteins required by us as it is cooked in Iron wok thus rich in iron also. Ghee (Clarified butter) is used to prepare the seasoning which adds the great flavor to Ras. The Boiled dal mixture is used to make dry savory as a side dish and is called Gude.In Kumaon Ras is taken with simple plain boiled rice along with lai/Palak sabji and Mooli, Bhanga (A seeds used as spice in Kumaon) ki chutney. It is winter special and Kumaon is cold in summers and coldest in winter so there it is made throughout the year.

Preparation Time: 15 minutes
Cooking Time: 90 minutes
Servings: 8 Large Servings

Ingredients Required For Making Ras: (Measurements are of a tea cup having 120 ml. volumes)
  • 1 cup Bhatt (Flat Black Beans). Also known as black Soya bean
Bhatt (Black Beans)
  • 1 1/2Cup  Gahat (Brown Beans/Kultha/ Vicia faba equina)
Gahat (Hulga/Kultha) Vicia faba equina
  • 1/2Cup Bengal gram
Kala Chana(Bengal Gram)
  • 1/2Cup Chick Peas (Chole)
Chick Peas (Chole)
  • 1/2Cup Rajma (Any variety)
Rajma
  • 1 Cup Kali Urd (Sabut Urd/Whole Urd)
  • 2-3 cm. Piece of Cinnamon
  • 4-5 Cloves
  • 15-20 ml. Ghee
  • 1 Teaspoon Cumin seeds
  • 3-4 Whole Red Chilies
  • 1 Teaspoon Jambu (Optional)
Jambu
  • 1 Pinch Hing (Asafoetida)
  • Salt to taste
  • 2 Teaspoon Garam Masala
Directions For Making Ras (Cudkani):
  • Clean all whole grams nicely and mix them.
Mixture of Whole Pulses(Sabut Dal) for Ras
  • Wash the mixture of dals till clear water comes out.
  • In a pressure cooker take
    • Washed mixture of dals
    • 500-600 Lt. Water
    •  Lawang (Cloves)
    • Piece of Cinnamon
    • 2 Tea spoon Salt
    • 1 Tea spoon Turmeric Powder
  • Close the lid and heat on high flame till pressure builds in the cooker. Bring the heat to low and cook for 40-45 minutes.
  • Switch off the heat and allow the cooker to cool.
  • Open the cooled cooker and sieve the cooked contents through a sieve.
  • Take all cooked solid and add 200 ml. water stir and sieve the liquid again.
  • Repeat the process again. Mix all the three filtrates and put it in a big Iron wok.
Liquid Filtered from Boiled Dal Mixture

Boiled Dal Mixture After Sieving the Liquid
  • Keep the iron wok with stock (Filtrate) on high heat till it starts boiling. Lower the heat and let it simmer till it reduces to half. The soup color will turn from brown to black. 
Filtrate (Liquid after filtering the boiled dal Mixture Boiling
  • Add garam masala and cook for 5 minutes.
Garam masala Added to Black thick filterate
  •  Add salt according to the taste.
  •  In a Pan take 20-25 ml. ghee and heat it. When the ghee is smoking hot lower the flame and In the order written below add
    • Cumin seeds
    • Red Chilies
    • Jambu
    • Hing
Tadka (Seasoning for Ras)
  • The seeds will become brown and splutter and wonderful odor of spices will start coming with in 30 second of cooking. Immediately add the seasoning to the contents in the wok.
Ras ready to be served
  • Cover and let the flavor of seasoning seep to the Ras.
Ras
Directions For Mkaing Gude:
  • The boiled dal mixture is used to make Gude.
  • In a cooking vessel take mustard oil and heat it.
  • When the oil is hot add 
    • 1Tea spoon Cumin seeds
    • 1Tea spoon Mustard Seeds
    • 4-5 Whole Red Chilies
    • Pinch of Asefoetida
  • The seeds will splutter and chilies will become dark in color , lower the flame and add the boiled dal mixture and mix nicely.
  • Add 
    • Salt to taste
    • 1 Tea spoon Amchur
    • 1Tea spoon Red chili powder and mix nicely.
  • Cover and cook for 10-15 min. with occasional stirring.
  • Gude are ready.
  • Serve Gude with Ras-Bhat (Rice) as side dish with a wedge of lemon.
  • Gude can be had as chat/snack with some finely cut onion,cilantro and lemon juice mixed with it.
Gude
  • Serve piping hot Ras with Rice, And any green vegetable, Gude, Slices of Mooli (radish) or it can be had as soup also.
  • A dollop of Ghee on the top of Ras does wonder.
Tips:
  • Gahat should always be more than Bhatt. You can increase the ratio of Gahat: Bhatt to 2:1.
  • While serving 1 teaspoon of ghee can be added to Ras. It does wonders to taste and flavor.
  • If your wok is small then you can boil some amount of filtrate from boiled whole first and when its volume reduces then keep adding more till all is cooked in wok and reduced to half.
  • Garnishing of Ras with finely cut cilantro enhances the flavor of Ras.
  • Many people add rice/wheat/flour to thicken Ras I prefer taking more dal mixture and boiling it to absolute softness then boiling the extract of the boiled dal till it comes to the thick consistency of my requirement.
  • Adding flour changes the taste the idea is to have good Ras not to save Dal (Whole pulses mixture).
  • Do not add Tur/Masoor/Moong/Chana dal to Ras.
Suggested Variations:
  • Now a day’s most of the people do not have Iron wok. Even if the Extract of boiled dal mixture is cooked in any other wok than iron wok the color will become blackish-brown and taste will not be too different than the original taste.
  • If you do not have iron wok then to bring the taste of Ras as near to original as possible you can put two three big iron (Not steal nails or pins) nails after washing them well and packing them in a piece of cloth to dal extract while it is boiling in wok then removing them before seasoning (Tadka). (Big nails will be removed without difficulty. Never put small nails).
  • Finely cut onion and garlic can be sauteed till light brown and this seasoning can be added to Ras. My experience is that Ras should be given Tadaka of the spices I have mentioned in the recipe even if you do not have Jambu it does not matter. 
  • Gude can be had without tempering or seasoning. 2 teaspoon of mustard oil and some amchur (Dry raw mango powder), green chilies, cilantro added to the boiled dal left after the extract is removed tastes classic.

LinkWithin

Related Posts Plugin for WordPress, Blogger...