Showing posts with label Mildly spicy. Show all posts

Wednesday, 25 November 2015

Bathua-Raita/बथुआ का रायता (Dip of Goose-foot in curd)

bathua Raita with Mustard-Curry Leaf Tempering
Bathua Raita
Winter is the season of my favorite green leafy vegetables, Sarson, Batua, Methi, Mooli to name the few. Bathua (Chenopodium Album) is also known as Pig weed, Wild spinach, Lamb Quarters and Goose foot.
The common names are really undeserved names bestowed on Bathua, as it is rich in Iron, Calcium, Magnesium, Vitamin A, B6, C and thus very nutritious and I would say very tasty. Bathua is grown in northern India and harvesting starts in winter season. It is used either alone to make savories like raita, sabzi and stuffed parantha or mixed with mustard leafs, spinach to make Sarson ka Saag. Today I am writing the recipe of most loved raita of winters in my family “Bathua Raita”. This raita if made in skimmed milk curd (Yoghurt)  then the fat content becomes extremely low and the nutrients present in milk and Bathua complement each other.

Preparation Time: 10 min.
Cooking Time: 2- minutes
Servings: 4 large servings (400 gm approx..)

Nutritional Value of Bathua raita: (made from skimmed milk curd)
Cal: 180
Carbs: 26 gm.
Fat: 0.8 gm
Cholesterol:  5 mg.
Sodium: 230 mg
Potassium: 452 mg
Sugars: 19 gm
Protein: 18.2 gm.
Dietary Fibers: 4gm.
Vitamin A, B6, C
Minerals: Calcium, magnesium, Iron

Ingredients Required For making Bathua raita:
  • 1 Big Bunch of Bathua Sprigs 
  • 250 gm Fresh Thick Curd (Full cream/Skimmed milk)
  • 1/2 Lemon
  • 1 Green Chili or to taste
  • 1/2 Teaspoon Mustard seeds
  • 2-3 Sprigs of Fresh Coriander leafs
  • Salt to taste
Directions For making Bathua raita: 
  • Clean coriander sprigs in flowing water and keep aside.
  • Separate leafs of Bathua from its stem. The top soft crown can be taken as it is if it does not have flowers or seeds. 
  • Wash the separated leafs in flowing water. Drain water from the washed leafs.
  • Take 10ml. ((lesser the water taken better it is) in a thick bottom pan and heat it. When the water heats up add the washed Bathua leafs to it and cover.
  • Let it simmer for a minute then switch off the heat and allow it to cool.
  • There will be very little water left in the cooked leafs and they will be of bright green color. If cooked on high flame and for longer time then they will gain darker color and the taste will not be so good.
Cooked Bathua Leafs
  • Pulse the cooked leafs of Bathua with cleaned and washed leafs of fresh coriander leafs and green chilies.
  • The paste should be fine and smooth. The thick paste should be a bowl of 200 capacity full (or slightly less, too less paste will not give full taste of bathua)
Cooked Bathua Paste
  • Beat the curd with the help of a beater or fork.
  • Add paste of Bathua to the curd and mix.
  • Add freshly squeezed juice of half a lemon (Not more than 2 teaspoon).
  • Add salt to taste and mix nicely.
Bathua Raita
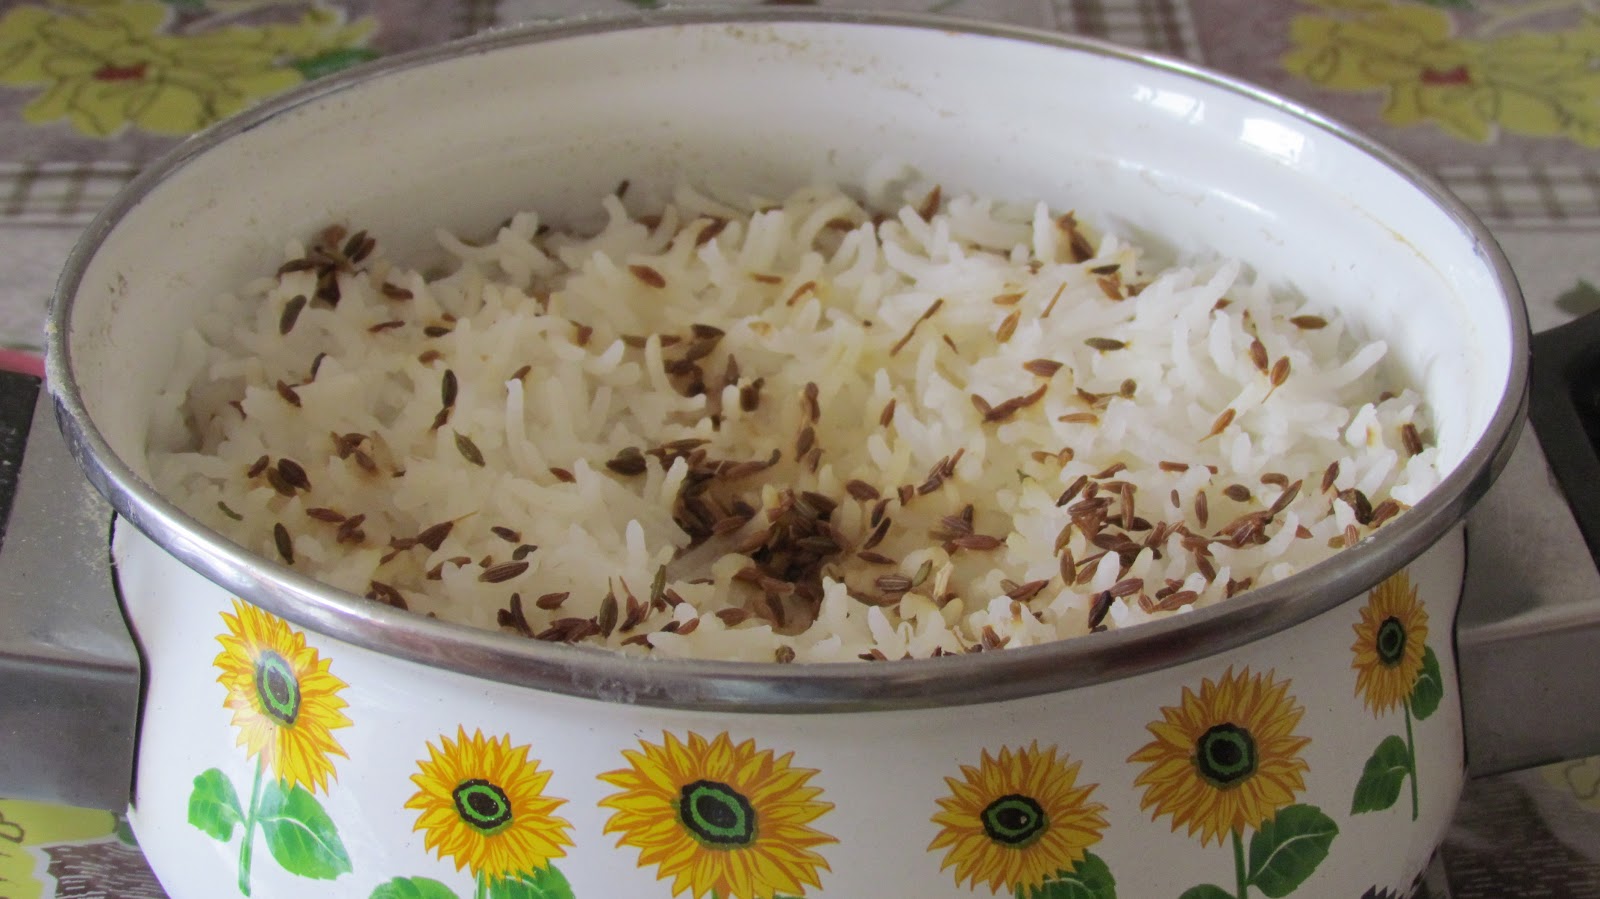
  • In a pan take 1/2ml of oil and heat till it smokes. Add mustard seeds and let them splutter.
  • Top the mixture with the tempering of mustard seeds.
Raita is ready to be enjoyed with stuffed parathas, dal-chawal, roti etc.

Bathua Raita With Mustard Tempering

Tips:
  • The Bathua stems remaining after removing the leafs for raita should not be thrown. The soft portion should be separated from hard part and used in making soup with tomato or can be added to spinach while making savory.
  • Bathua leafs should not be cooked for longer that 2 minutes as they are delicate and the delicate flavors will be lost along with the green color.
  • Curd should not be sour and thin. Thick fresh curd is required for raita.
  • Very little oil is required for tempering; excess oil will make the raita unnecessarily oily.
  • Check the green chili for the hotness. Else you will end up with bland or very hot raita.
Suggested Variations:
  • 1 teaspoon powdered sugar can be added to balance the salt and acidity.
  • Curry leafs can be added to hot oil along with the mustard seeds while preparing tempering. The crisp curry leafs add great texture to the raita.
bathua Raita with Mustard-Curry Leaf Tempering

Sunday, 2 March 2014

Uttaranchali Sabut Masoor Ki Dal (Whole Lentil broth)

A meal of Rice, Sabut Masoor ki Dal, Palak ki sabji, Sprout Salad and Coriander-Mint Chutney

Uttaranchali Sabut Masoor Dal (Whole Brown Lentil) 
Whole pulses and grains carry many nutrients which are lost during splitting the dal and removing the thin colorful layer each dal (Pulse) has. The top layer is rich in vitamin B, Thus each of us should include the whole grains and pulses in our diet. Masoor dal is light brown to dark brownish grey in color from outside and orange in color from inside. Easy to digest very good in taste this dal can be combined with many other split pulses to make a mix pulse savory (Mixed dal). Best combination is Sabut masoor dal with plain boiled rice and some green vegetable and of course coriander – mint chutney which is such an integral part of Kumaoni meal. In Kumaon onion, garlic is not used for seasoning of any dal because many people avoid onion and garlic. I wish to tell something, the reason of which I have not understood till date, is that Masoor dal (Whole/Split), onion, garlic was forbidden for widows in Kumaon along with many other taboos. Why??? Things have changed for good since my generation.


Preparation Time: 5 min.

Cooking Time: 20-25 minutes

Servings: 4 Large Servings

Nutritional value Daal made from of 150 gm Sabut Masoor (Whole brown lentil) : (Approx.) 
Energy : 190 cals. 
Fats : 4gm
Carbs : 30 gm
Cholesterol : 0 
Dietary fibers : 12 gm
Proteins : 13gm
Sugars : 3gm
Sodium : 10 mg
Potassium : 731 mg
Vitamins : folates, Thiamine, Riboflavin, Naicin B6, Pentanoic acid 
Micronutrients: Selinium, Phosphorus, Magnesium, Iron, Copper. 
Due to high fiber content sabut masoor helps in avoiding constipation. 
It helps in lowering HDL and increases LDL. 
Helps in avoiding gestational diabetes. 


Ingredients Required For Making sabut Masoor dal (Whole Lentil):

  • 150 gm. Whole Lentil (Sabut Masoor dal)
  • 1 teaspoon Cumin Seeds
  • 1 Pinch of Asafoetida
  • 2-3 Whole Red Chilies
  • 5 ml. Ghee
  • 1 Teaspoon Jambu (Optional)
Jambu a Herb of higher region of Himalayas
  • 4-5 Cloves
  • 2 cm. Piece of Cinnamon
  • Salt to taste
  • 1/2Teaspoon Turmeric Powder
  • 500 ml. Water
Directions For Making Sabut Masoor Dal:

  • Clean and wash the masoor dal nicely.
  • Soak washed dal in ml. water for 30 min.
  • Add
    • Turmeric
    • Cinnamon
    • 2 Cloves
    • Salt
  • Boil the dal and spices mixture till dal is soft to touch. (Dal should get mashed when pressed between fingers). 
Boiled Sabut Masoor
  • Heat ghee in a pan and when the ghee is smoking hot, lower the flame.
  • Add 
    • 2-3 cloves
    • Jeera (Cumin seeds)
    • Whole red chilies
    • Jambu
    • Hing (Asafoetida).
  • Cook for 30 sec. (The jambu and red chilies should become light brown in color. Wonderful aroma will come. Seasoning is ready.
Tadaka (Seasoning) for Sabut Masoor Ki Dal
  • Add the seasoning (Tadaka) to boiled dal and cover the dal.
  • Add water to the dal if the dal is too thick for your liking and give just one boil. 
Uttaranchali Sabut Masoor Ki Dal
  • Serve hot with rice with Palak / methi / lai vegetable as side dish.
Rice, Sabut Masoor ki dal, Palak ki sabji, Sprout Salad and Coriander Mint Chutney
Tips:
  • Do not boil the dal so much that it dissolves in water. The dal should be visible but soft.
  • Do not add too much water. Watery masoor dal does not taste good.
  • If the dal is soaked and cooked in pressure cooker then it takes 10 min. for the dal to be cooked. In open vessel it takes at least 45 min.
Suggested Variations:

  • Jambu is not available everywhere therefore instead of jambu pinch of oregano can be taken.
  • Though garlic and onion are not used in Kumaon in dal but sabut Masoor tastes great with the tempering of onion and garlic with predominantly garlic flavor.
  • Cut finely
    • One small onion
    • 8-10 cloves of garlic
    • 1 green chili
    • 2 cm. Piece Ginger
  • Shallow fry onion and garlic in hot ghee till light brown.
  • Add ginger and green chili. Cook for one min.
  • Add boiled dal and cook with stirring till it starts boiling.
  • Remove from heat and serve.

Tuesday, 17 December 2013

Uttaranchali Massor dal (Lentil broth as made in Uttaranchal , India)


Uttaranchali Masoor Dal

I was going through the stats of my blog when I realized that one of the readers was interested in knowing how masoor dal is made in Kumaon, Uttaranchal. Thus I thought of blogging the recipe for cooking my humble masoor dal as it is made in Uttaranchal. Really speaking sometimes the taste of childhood and the love with which mother / grandmother cook and serve make even simple thing too special and we try to replicate them. I will give the recipe for the dal but from where I am going to bring the same love and care as my mother had poured into the dal. God forgive me for my audacity of trying to replicate the taste.

Om
Preparation Time: 5 min.

Cooking Time: 20-30 minutes

Servings: 4 Large servings


Ingredients required For making masoor Dal:

  • 150 gm. masoor dal
  • 1/2Tea spoon Turmeric powder
  • 2 Tea spoon Ghee (If the ghee is melted then 10 ml.)
  • Salt to taste
  • 1/2Tea spoon Cumin Seeds
  • 2 Tea spoon Jambu (Herb from Kumaon)
  • 2-3 Whole Red Chilies
  • 1Pinch of Hing (Asafoetida)
Directions For making masoor dal:

  • Wash masoor dal till water comes out clean.
  • In a thick bottom cooking vessel take
    • Washed dal
    • 5 ml. ghee
    • Salt
    • Turmeric powder
    • 250 ml. water
Washed Masoor Dal, Turmeric powder, salt and water
  • Heat the ingredients in the vessel on high flame till water starts boiling.
  • Lower the flame, cover and cook on low flame with occasional stirring for 20 min.
Masoor dal after 20 min of cooking on low flame
  • If required add hot water in little portions as such that the dal should not become too thin and watery.
  • Cook till the dal becomes soft but not completely dissolved in water.
Masoor dal after 25 min. of cooking on low flame
  • Remove from gas.
Masoor dal ready for seasoning
  • In a small pan / serving spoon heat ghee.
  • When the ghee is very hot add cumin seeds.
  • Cumin seeds will splutter, add whole red Chilies. Chilies will change the color to dark red.
  • Immediately add Jambu and Asafoetida.
  • Lovely flavor of seasoning will come and jambu will start becoming brown in color.
Seasoning (Tadka) ready
  • Add this hot ghee with seasonings to the hot dal and cover the immediately after putting the spoon with seasoning in the dal.
  • When the seasoning is put to the dal should be covered immediately to avoid spilling of dal and seasoning. Also covering the dal after the seasoning is added will make sure the taste and flavor of jambu, cumin, red chili and Asafoetida seep nicely to the dal. 
Seasoning (Tadka) added to Cooked hot dal
Uttaranchali Masoor Dal
  • Masoor dal as made in Uttaranchal is ready to be served with rice (Bhaat), Palak ka kapa and bhanga (A Kumaoni seed used to make chutney) ki chutney.
  • Garnish with fresh, finely cut coriander.
Tips:
  • Do not change ghee to any other cooking oil the taste will not be the same. If you want reduce the amount to half of the amount told in ingredients.
  • Taste of this dal depends on the exact state it is to be cooked if cooked less it will not mix with water if overcooked it will become like a paste.
  • If you are cooking in pressure cooker keep the cooker on medium flame till pressure is built and the moment cooker gives first whistle, switch off the gas and allow the cooker to cool. Dal will get cooked while cooker is getting cooled.
  • Since Jambu is available only in Kumaon so if you do not have it, no option other than do not use it. The flavor which red chilies, cumin seeds and Asafoetida impart to ghee itself is heavenly.
Suggested Variations:

  • None.

Monday, 22 July 2013

Matar-Mast Patta Gobhi (Cabbage-Pea Indian savory)


Matar-Mast Patta Gobhi (Cabbage-Peas Vegetable)
Cabbage is rich source of sulfur, dietary fibers, iodine and vitamins. The only thing which goes against it is the salt content in it. But that is counteracted by adding less salt in the vegetable. I cannot think of the reason why cabbage cannot be enjoyed in various forms of savory preparation and as stuffed parantha. I love adding the tender central leafy portion of cabbage to my salad. Green peas apart from adding a distinct flavor to the cabbage savory also add color to it thus making it not only tasty but attractive to look at, and I am a firm believer of good appearance and smell of food. One very important thing to be remembered is that cabbage savory should never be over spiced and garnished because this will over shadow the flavor of cabbage completely.

Preparation Time: 30 min (If fresh pea pods are being used)
Cooking Time: 30 min.
Servings: 6 large Servings

Ingredients Required For making Matar-Mast Patta-Gobhi:
  • 500 gm. Cabbage
  • 250 gm. Shelled Peas ( 500 gm. Fresh Pea Pods)
  • 1 Teaspoon Cumin Seeds
  • 1/2 Teaspoon Mustard seeds
  • 2 Green chilies
  • 2-3 ml. Olive oil / any cooking oil
  • Salt to taste
Direction For Making Matar-Mast Patta-Gobhi:
  • Cut cabbage (Patta-Gobhi) to long thin pieces.
Long Thinly Shredded Cabbage
  • Shell pea-pods.
  • In a pot take 250 ml. water and a teaspoon salt and boil. When the water comes to boil add the shelled peas and allow the peas to boil for one minute.
  • Remove from heat and sieve the parboiled peas. Keep the par-boiled peas aside; discard the water used for boiling.
  • Wash the cut cabbage in excess water and then drain water from cut and washed cabbage.
  • Take a thick bottom wok and heat oil in it on high flame.
  • When the oil is smoking hot reduce the heat and add mustard seeds, the seeds will splutter.
  • Add cumin seeds and green chilies. Allow the cumin seeds to splutter and green chilies to cook for I min.
  • Add cabbage in the seasoning and mix nicely.
  • Cover and cook for 3-4 min with occasional stirring and turning the cabbage to ensure even cooking.
Cabbage cooked with seasoning for 3-4 min.
  • Add salt and turmeric powder and mix nicely.
  • Cover and cook for 2-3 min.
Ready for Shelled/preserved Par-Boiled Peas to be added
  • Add par boiled peas and mix.
  • Cover and cook for 5 min. with occasional stirring.
  • Remove the cover, bring the heat to maximum and cook with continuous stirring to dry any juices of vegetables left in wok.(it will take less than one minute).
Ready To Be Served
  • Remove from heat. Take out in a serving bowl and garnish. I prefer it without any garnishing, because the smell of peas in cabbage is too good for me to overshadow with any herb.
Matar-Mast Patta Gobhi Cabbage-Peas vegetable)
Tips:
  • Cabbage is the vegetable I prefer washing after cutting reason being that any pesticide sprayed gets trapped between leafs while the cabbage is growing. Thus one has to get rid of it before cooking.
  • Another way of removing the pesticide is remove each and every leaf and then those leafs should be washed in flowing water then cut. This makes the work tedious.
  • Never add salt right in the starting. This will cause the cabbage to lose the juices and go limp. Do you want the vegetable crisp and juicy or limp?
  • Par-boiling and then adding the peas will retain the lovely green color of peas.
  • Do not add too much spice (Chili, salt, garam masala) as the sweetness of peas and cabbage is lost.
  •  Always taste the green chili for its hotness and then depending upon its hotness increase / decrease the amount of green chilies.
Suggested Variations:
  • 1/2Teaspoon amchur can be added just before removing from wok.

Wednesday, 4 July 2012

Makki Ki Sabji /मक्के की सब्ज़ी (Sweet corn cooked with vegetable)

Makki ki Sabji (Sweet Corn Vegetable)
It is really surprising that the humble Fresh sweet corn, which was supposed to be poor man food in India, can be actually converted to number of delicacies. When the corn is soft and sweet on the cob my family loves that time of year. As they are spoilt by the choices available to them for snack, right from boiled corn on the cob, cutlet, corn chat or simply corn on the cob roasted on hot amber.
One day only one corn cob was left and if roasted or boiled only 1/4piece each would have got, not an appealing idea. So I kept the boiled corn cob in the fridge and made it to chatpati sabji along with some beans and cauliflower so that the nutritional value also increases. My efforts and innovation were highly appreciated by my family. I got my reward so what are you waiting for try it this season.

Preparation Time: 15-20 min.
Cooking Time: 5 min.
Servings: 3-4 large servings.

Ingredients for Making
  • 1 Fresh Sweet corn cob
  • 100 gm. Cauliflower
  • 50 gm. French beans
  • 1 small Carrot
  • 1 Medium size Potato
  • 1 medium size Tomato
  • 1 Teaspoon Cumin seeds
  • 2 Bay leaves
  • 1 Fresh Green Chili
  • 1/2 Tea spoon Red chili Powder
  • 1/4 Tea spoon Turmeric powder
  • 1/4 Tea spoon Amchur Powder
  • 1/2 Tea spoon Sugar
  • Salt to taste
  • 1 Tea spoon Olive oil / cooking oil
Directions for Making
  • Remove the green coverings of fresh corn cob and boil it in water for 5 min.
Boiled Corn on the Cob
  • Remove the boiled corn cob from hot water and allow it to cool.
  • Separate the boiled corn from the cob.
Boiled Corn on the Cob and corn removed from Cob
  • Discard the cob and keep the boiled corn aside.
  • Peel wash and cut potato to small pieces.
  • Cut Tomato to small pieces.
  • Cut French beans to 2-3cm. pieces.
  • Cut carrot to thin and 2-3 cm. long pieces.
  • Cut cauliflower to small florets.
  • Boil the cauliflower florets in salted water for 5min.
  • Drain water from boiled cauliflower florets by sieving them through a sieve.
  • Take Ghee in a thick bottom wok and heat on high flame.
  • When hot add bay leaves, cloves, cumin seeds Black cumin seeds and let the seeds splutter.
  • Add potato pieces and cook on low flame till soft.
  • Add carrots and tomato cook for 1-2min.
  • Add beans, cauliflower and boiled corn.
  • Mix nicely and cook for 2min.
  • Add salt, turmeric powder, salt, amchur powder and red chili powder.
  • Cook for 2 more minutes with continuous stirring to coat all vegetable pieces with spices.
  • Remove from heat and take out he colorful corn vegetable in a serving plate and serve with roti.
Makki (Sweet corn)ki Sabji
Tip:
  • Do not boil corn too much otherwise it will become hard and rubbery.
  • Do not cook for long time after adding vegetables because  limp vegetables and over cooked vegetables in Makki ki sabji taste bad.
Suggested Variations:
  • Olive oil can be replaced by any cooking oil.
  • Cabbage, Zucchini, Capsicum, Red bell pepper, Yellow bell pepper can also be added, only make sure they not over cooked.

Saturday, 30 June 2012

Shahi-Pulav (Rice cooked with Dry Fruits)

Shahi Pulav (Rice and Dry Fruits Pulav)
A rich and wonderful pulav rich in nutrition and delight to eyes and taste buds is a very easy to make. Dry fruits are present in every kitchen be it Indian or any part of the world. Rice is also an integral part of the kitchen. When you have a party to arrange just try this pulav along with the other fare you plan to make your guests will be surprised at by your planning the menu. I used to make it quiet often when the cooked rice used to be left from the dinner or lunch, and pack it in the lunch box of my children. The smile they used to give when they used to be back from school used to make my day. So why should you not try such a rewarding recipe. I am sharing with you all, you have to make it and enjoy with your friends and family.

Preparation Time: 10min.
Cooking Time: 30min.
Servings: 5-6 Large servings

Ingredients Required for Making Shahi-Pulav:
  • 250 gm. Basmati Rice
  • 50 -75 gm. Cashew nuts
  • 50 gm. Almonds
  • 50 gm. Raisins
  • 3-4 Green Cardamom
Green Cardamom
  • 1-2 Pieces of Javitri (dry flower of nutmeg)
Javitri
  • 4-5 Cloves
Cloves
  • 1 Tea spoon Shah Jeera ( Black cumin seeds)
Shah Jeera (Black Cumin Seeds)
  • 1/2 Tea spoon Turmeric Powder
  • 1 Tea spoon Red chili Powder
  • 1 Tea spoon Sugar
  • Salt to taste
  • 50 gm. Ghee (4 heaped tea spoon ghee) / Olive oil / cooking oil.
Direction for Making Shahi-Pulav:
  • Wash rice.
  • Take in a thick bottom container washed rice and 500 ml. water and keep the container on gas on high flame without covering it.
  • Let the contents boil.
  • Do not stir.
  • Cover the container and cook till rice becomes soft (approximately 20min.).
  • Remove from gas and immediately drain excess of water by sieving it.
  • Pour water on the rice in the sieve to remove excess starch so that the rice grains do not stick to each other.
  • Keep aside for cooling.
Rice Boiled to soft texture and then washed with fresh water to remove excess starch
  • Cut Almonds and cashew nuts to 2-3 mm. pieces (each almond and cashew to 2-3 piece).
  • Take a thick bottom wok and take ghee in it and heat on high flame.
Ghee being heated
  • To hot ghee add broken cardamom, Shah jeera (black cumin), Javitri, cloves, and cook for 1 min.
Shah jeera, cardamom, javitri added to hot ghee
  • Add cut almonds and cashew nuts and cook till gain golden color. 
Almonds and cashew nuts added to hot ghee and spices
Ready for adding boiled rice
  • Add boiled rice to it and mix nicely.
  • Cover and cook for 2-3 min.
Boiled rice added to spices and dry fruits mixture in ghee
  • Add turmeric powder, salt,red chili powder and mix nicely.
Turmeric powder, salt, red chili powder added to rice, spices and dry fruit mixture in ghee
  • Add raisins and sugar and stir.
Sugar and raisins added ti rice mixture
  • Cook for 2-3 min. without covering and remove from gas.
  • Take out in a serving plate and serve hot. Add few drops of lemon juice and the color will become beautiful yellow.
Shahi Pulav
Shahi pulav after adding few drops of lemon
  Raeally speaking it looks so fabulous that garnishing is not required but if you want use some slices of apple / seeds of fresh pomegranate for garnishing Shahi-Pulav.

Tips:
  • Though the taste comes out best with ghee(clarified butter), yet those who for health reason do not eat ghee can replace it with cooking oil. Preferably Olive oil.
  • Do not cook rice to extreme softness else the Pulav will not come out well.
  • If you are not comfortable with boiling rice in the open container then cook it in pressure cooker.
  • Do not over fry the almonds and cashew else they will not taste good in pulav.
  • Drain water from boiled nicely so that each grain of boiled rice is separated.
  • Any rice can be used for making the pulav but best results are obtained if Basmati rice is taken.

Suggested Variations:
  • Pistachios, dry seeds of water melon (gabz), dry seeds of cucumber can also be added along with almonds and cashew nut.
  • You can boil rice with little Shah jeera and salt to enhance the jeera flavor.

Rice boiled with Shah Jeera( black cumin seeds)

LinkWithin

Related Posts Plugin for WordPress, Blogger...