Showing posts with label Nutritious. Show all posts

Thursday, 20 February 2020

Chilke Wali Moong Dal (Split Green Gram) ke Badeel

Moong Dal Badeel

Moong dal is easy to digest, high in proteins and vitamins. In Kumaon badeel are made from different dals. These are taken as side dish or as snacks. Being high in proteins, low on fat and carbs they are very healthy. Since we are using the green dal not yellow split dal (Chilke wali not Dhuli moong dal) thus the coveted vitamins and dietary fibers are also not lost.
Served with green chutney made from Dhaniya-Pudina(Coriander and mint leafs) badeels taste just yummy.
Preparation Time:
Cooking Time:
Servings: Makes 25-30 Pieces

Ingredients Required For Making Badeel:
  • 150 gm: Chilke Wali Moong Daal (Split Green Gram)
  • 2-3: Green Chilies
  • 10 gm: Ginger
  • 2-3 Sprigs: Fresh Coriander Leafs
  • Salt to taste
  • 15-20 ml. Cooking oil (I use Mustard oil)
  • 3-4 Teaspoon: Ghee (Clarified Butter) for panfrying the badeel
Nutritional Value (approx) Of Badeel (made from 150 gm of dal) )
Cal 400
Fat 1gm
Sodium 30mg
Carbs50gm
Fibers 4gm
Protein 22 gm
Calcium and Iron Rich

Direction For Making Badeel:
  • Wash Dal till cloudy water comes after washing. Soak the washed dal in water for minimum 2-3hr. Dal will become soft. Since dal was washed before soaking thus it does not require washing after soaking.
  • In a mixer grinder take
    • Soaked Dal
    • Green chilies
    • Ginger
    • Fresh Coriander leafs
  • Grind them to smooth thick paste.
Paste of Moong Daal
  • In a thick bottom wok take cooking oil and heat.
20 ml. Oil heating 
  • When the oil is hot add Cumin seeds and let them splutter. Make sure they do not burn.
Jeera (Cumin) in hot oil
  • Once the cumin seeds have spluttered immediately bring the heat to low and add dal paste.
Dall and Spices Paste Added to Oil
  • Add salt and mix nicely so that before the paste thickens salt is mixed in it nicely.
Mixed Nicely And being Cooked On Medium Flame
  • Bring the heat to high and cook with continuous stirring and mixing till the paste thickens. It will take 2-3 minutes.
Afetr 5 Min. of Cooking On Medium Flame
  • Bring the heat to low and sprinkle 4-5 table spoon water. Cover and cook on low heat for 2-3 minutes with in-between scrapping from the edges and mixing.
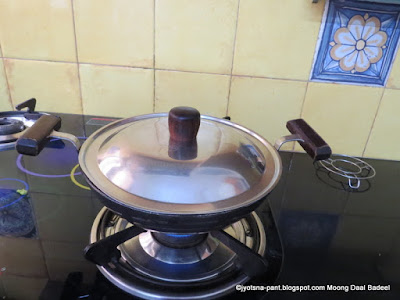
Cooking on Low Flame Afetr sprikling 20 ml. water
Cooked Daal Paste
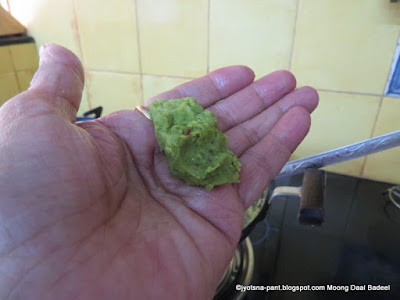
  • To check if it is cooked perfectly take little cooked dal paste in hand and press with fingers. Perfectly cooked dal paste will not stick to fingers.
 Daal Paste Does Not Stick to fingers
Not Sticking Even When Folded Between Palm and Fingers
  • Grease a plate and take out he cooked paste in the greased plate.
  • Spread evenly and pat it with a spatula.
Set and Cut Badeel

  • Let it cool. Once cooled cut it into desired shape pieces.
Moong Daal Badeel
Enjoy the Badeel with Mint-Coriander chutney.

To make the badeel with crisp crust:
  • Grease a thick bottom pan with ghee then heat it.
  • Once the pan is hot, place the badeel in it and cook on medium heat till one side becomes crisp.
  • Flip and sprinkle 1-2 teaspoon ghee and cook till other side also changes color and becomes crisp.
Enjoy Moong Dal Badeel as snack or side dish.

Tips:
  • While pouring oil in the wok if oil is poured through the sides then whole wok will get oiled. This will minimize sticking of dal paste to the edges while cooking.
  • Thicker the paste easier will be its cooking, so use as less water while grinding as possible.
Suggested Variations:
  • Finely chopped onion can be sautéed and then dal paste added to it and cooked to make badeel with onion flavor in it.

Monday, 22 April 2013

Coconutty Beans and Carrots (Beans and carrots Cooked In coconut Milk)


Beans and Carrot Vegetable in Coconut Gravy
It is great feeling of excitement to experiment in the kitchen and yet better feeling of satisfaction when the experiment is well received by the family members. My husband calls himself my guinea pig as most of the new dishes go on his plate for approval, he is my best critic. I love south Indian food and being a North Indian I love blending North Indian taste with south Indian food. The freshness of beans and carrots and their color remain intact in this dish thus making it very appealing. Beans and carrots make the vegetable rich in Vitamin A,C, Calcium, Iron, Protein and also provide good amount of dietary fibers. The richness of coconut milk, curd gives a lovely flavor and unique taste to it.
Preparation Time: 30 min
Cooking Time: 30 min
Servings: 4 Medium helpings

Ingredients Required For Making Coconutty Beans and Carrots:
  • 100 gm. French Beans
  • 100 gm. Carrots 
  • 1 Fresh Coconut 
  • 100 Gm. Thick Curd
  • 1/4Teaspoon Turmeric
  • 1/2Teaspoon Cumin seeds
  • 1/2Tea spoon Mustard seeds
  • 5-6 Curry Leaves
  • 1-2 Whole Red chilies
  • 1 Pinch Asafoetida
  • Salt as per taste
  • 1/2Tea spoon white pepper powder
  • 1 ml. olive oil / cooking oil
  • 2-3 Sprigs of Fresh Green Coriander

Directions For Making Coconutty Beans and Carrots:
  • Wash and pat dry the Beans and Carrots.
  • De-vein the beans and cut hem to 2-3 inch long thin pieces.
  • Clean the carrots of all small roots hanging from it and cut to 2-3 inches long thin strips.
Carrots and Beans cut to strips
  • Grate the kernel of fresh coconut and grind it to thin paste by adding water in little amount.
  • Squeeze all milk out of it by using a fine cotton cloth.
  • Keep this thick coconut milk aside.
Thick Coconut Milk
  • Grind the remainder solid after taking out milk again with water and squeeze the remaining milk again.
  • Keep this thin milk separate.
  • Take oil in a thick wok and heat till smoking hot.
    • Lower the flame and add
    • 1/4Tea spoon Mustard seeds
    • 1/4Teaspoo Cumin seeds
    • 3-4 Curry leaves
    • 1 Red chili
  • Cook for 30 sec. The seeds will split, color of curry leaves will become dark, Red chili will become brown red and wonderful aroma will start coming.
  • Add cut beans and carrots
  • Mix and cook on low flame till they just become tender. Do not overcook them.
Beans and Carrots being sauteed
  • Add white pepper powder and mix. Cook for 31-2 min.
White Pepper powder added to sauteed vegetables
  • Add the thin coconut milk and cook on high flame for 2 min.
  • Beat thick curd to fine homogenous mass.
  • Lower the flame and to the vegetable and coconut milk mixture add
    • Thick coconut milk
    • Beaten thick curd
    • Turmeric powder
  • Mix nicely and cook on low flame for 2-3 min. the gravy will become thick.
  • Add salt and mix.
Salt and Turmeric powder added and given one boil
  • Switch off the gas and cover the wok with vegetable and allow the flavor of coconut milk to seep to the vegetable.
  • Coconutty beans and carrots are ready to be served.
Coconutty beans and carrots
  • Heat the Coconutty beans and carrots and take out in a serving bowl.
  • Enjoy Coconutty beans and carrots with Roti, paratha, rice.

Tips:
  • Never peel the carrots, just remove the dirt by washing and remove the fibrous roots with knife. 
  • Do not cut the carrots too thick.
  • Do not overcook the vegetables else the color of beans and carrots will not remain bright and the crunchiness of the vegetables will be lost.
  • Keep the thick and thin milk separately and always add thin milk first.
  • Salt should be added last else the coconut milk may curdle.
  • Always add Mustard seeds before cumin seeds, red chili and curry leaves.
  • Do not add water to the vegetables while cooking the water of coconut milk is enough to cook them to crunchiness.
Suggested Variations:
  •  Heat 1/2ml. of oil in a pan.
  • To the hot oil add
    •  1/2tespoon mustard seeds
    • 1/2Teaspoon Cumin seeds
    • 3-4 Curry leaves
    • 1Red chili
    • Cook till the seeds splutter, and the aroma of spices starts coming out.
    • Pour this seasoning over the vegetable and serve.
  • In the absence of fresh coconut canned coconut milk (200ml.) / 100 gm. Dry Coconut milk can be used.
  • If dry coconut milk is used,  then to make milk dissolve it in 200 mil. Luke warm water coconut milk is ready.
  • For change in taste few strips of cauliflower can be added along with carrots and beans.

Monday, 18 February 2013

Mushroom Paneer Grilled sandwich

Mushroom Paneer Toasts with Tomato sauce

Cottage cheese is high in calcium and protein. And mushrooms are high in protein and Vitamin A. When paneer is mixed with mushrooms it makes excellent filling for toasted sandwiches.  Breakfast should never be taken just because it has to be taken; a nourishing, nutritious, less oily breakfast is the apt way to start the day. Healthy yet tasty,light yet filling and nutritious, these sandwiches are very good for breakfast, snack as well as lunch box of school going children. So next time you want to give pleasant surprise to your children just make these crunchy juicy mushroom paneer sandwiches and serve in breakfast or pack them in their lunch box.

Preparation Time: 10 min
Cooking Time: 30 min.
Servings: 8 – 10 Sandwiches

Ingredients Required For Making Mushroom Paneer Toasted Sandwiches:
  • 1 Bread
  • 250 gm. Paneer (Cottage Cheese)
Paneer
  • 8 – 10 Large mushrooms
Mushroom
  • 1 Small Onion
Onion
  • 4 -5 Cloves of garlic 
Garlic
  • 1 Green Chili
Green Chilies
  • 1/2Teaspoon Red Chili Powder
  • Salt to taste
  • 3 – 4Tea spoon Olive oil / Butter or any cooking oil
Directions For Preparing Mushroom-Paneer Sandwiches:

    Step1. Making Filling of Mushroom and Paneer:

  • Wash and towel dry Mushrooms.
  • Crush the mushrooms to small pieces.
  • Cut Paneer to pieces.
  • Mash the paneer pieces.
  • Cut onions finely.
Finely cut Onion
  • Cut garlic finely.
Cut Garlic
  • Cut Green chili finely.
  • Tale 1 ml. oil in a wok and heat
  • When hot lower the flame and add finely cut onion.
  • Cook with continuous stirring for 2 min. (the color of onion should become transparent)
  • Add finely cut garlic and cook for just one min. with regular stirring.
  • Add mashed paneer and cook for a 2-3 min.
  • Add crushed mushroom and bring the flame to high.
  • Mix nicely and cook for 2-3 min. with continuous stirring.
  • Add
    • Salt
    • Green chili
    • Red chili powder
  •  Mix nicely
  • Bring the flame to high and cook with continuous stirring for 1 min.
  • Remove from gas and take out in a bowl and allow it to cool. (The mixture of filling should be removed just when the mushrooms start leaving water in wok)
Mushroom - Paneer filling for sandwiches
Step2. Making Sandwich:
  • Sprinkle 2-3 drop of oil on both side of sandwich toaster.
Toaster heated with 2 drops of olive oil on each section
  • Heat the sandwich toaster.
  • Take a slice of bread on a plate and scoop 2-3 tea spoons filling on it.
Bread Slice with Mushroom Paneer mix
  • Place another slice on it.
Second slice put to cover the slice with Mushroom Paneer mix
  • When the toaster is hot then place this sandwich in a toaster.
Sandwiches of Mushroom Paneer mix kept on hot Toaster
  • Toast for 2 min.
  •  Open the toaster and sprinkle 3-4 drops of oil, close the toaster and toast again.

Sandwiches being toasted
  • Toast the sandwich till brown and crisp from both sides. (It should take 5 min.)
  • Take out hot mushroom-paneer sandwich and serve with tomato sauce.
Mushroom Paneer Toasts with Tomato Sauce
Tips:
  • After adding mushrooms cooking should be done on high flame.
  • Do not cook for too long after adding salt.
  • Do not mash mushrooms, crush them to small pieces.
  • If you find mushroom juices coming out too much add make crumb from one slice and add to the filling. (1 /2 tea spoon stored dry bread crumb can also be added)
  • The toasted mushroom paneer sandwiches taste best if made in olive oil or butter.
Suggested Variations:
  • Onions and garlic can be avoided and replaced by 1 tea spoon cumin seeds.
  • Oregano / basil/parsley can be added to the filling to give different flavor to the sandwich.
  • Finely cut coriander leaves can be added to the filling.
Finely cut fresh coriander sprigs
  • Instead white bread brown bread or multi grain bread can be taken to increase the nutritive value of sandwich.
  • For oil less sandwich, use nonstick toaster.
  • Edges of bread piece can be cut. The edge pieces can be sun dried and made to crumbs and stored in dry container for future use,

Sunday, 6 January 2013

Vada - Sambhar(Fried Indian Dumplings in Tangy soup)

Vada for Vada-Sambhar

Vada-Sambhar
Vada-sambhar along with coconut chutney is a yummy combination and can be had any time of the day, at the pretext of being hungry but want to eat something different than roti…In my house hold every Saturday / Sunday Vada-sambhar used to be made for brunch and it used to be delightful sight to see my husband and children enjoying hot vada soaked in tangy-spicy sambhar along with sour and sweetish spicy coconut chutney. I am lucky to be born in a country which has such a diverse culture and food habit. Different state has different type of staple food and I try to make my kitchen a mini India, thus hope to keep on learning, improvising and blogging different recipes so that maximum people can know and learn about the wonderful Indian savory / sweets and breads and much more.

Preparation Time: 20 min. (Dal soaking time not included)
Cooking Time: 45 min (for vada), 45 Min (for sambhar)
Servings: 25 Medium Size Vadas

Ingredients required and Directions for making Sambhar Vada-Sambhar:
http://jyotsna-pant.blogspot.com/2012/05/sambhar-tur-dal-cooked-with-vegetables.html

Ingredients required for Making Vada: for Vada-Sambhar:
  • 250 gm. Urd Dal
  • 1 Large or 2 Medium Onions
  • 2-3 Sprigs of Fresh coriander Leaves
  • 3-4 Green chilies
  • 1 Tea spoon Red chili Powder (optional)
  • 1/2Tea spoon Turmeric Powder
  • Salt to taste
  • Cooking Oil for frying
Directions for masking Vada for Vada-Sambhar:
  • Wash Urd dal till the water from washing comes out clean.
  • Soak the washed dal in excess water for at least 4 hours.
  • Drain the water from soaked dal and grind it to thick, fine paste.
  • Cut onion fine.
  • Cut green chilies fine.
  • Cut Coriander sprigs fine.
  • Add
    • Dal paste
    • Finely cut Onions
    • Finely cut Coriander sprigs
    • Finely cut green chilies
    • Red chili powder
    • Turmeric powder
    • Salt
  • Mix and beat till it becomes creamy in texture.
Batter for Vada
  • Take oil in a wok and heat on high flame till smoking hot.
  • Reduce the flame when the oil is smoking hot.
  • Dip your fingers in water before picking the batter for vada.
Fingers dipped in water before picking the batter for vada
  • Take a small amount of dal mixture and flatten it on your palm to make a 3-4 cm. thick and 3 cm. (roughly) diameter round.
Pick the batter with wet fingers
Wet palm before placing the batter
Batter placed on the palm and made to round shape
  • Wet your fingers of the other hand and with the index finger make a hole in the center of dal round on your other hand palm.
Hole made at the center of the batter
  • Carefully slip the dal round with hole on the fingers of the other hand and put it carefully in hot oil for frying.
Vada batter with hole being put in oil for frying
  • Repeat the same and fry at one time 4-5 vadas on low flame by carefully turning then occasionally.
Vada being fried
Vada fried to golden brown color
    Vada For Vada-Sambhar
  • When the vadas are fried in both sides to golden color take them out in a serving plate and serve hot with piping hot spicy sambhar and coconut chutney.
Vada-Sambhar
 http://jyotsna-pant.blogspot.com/2012/05/sambhar-tur-dal-cooked-with-vegetables.html
http://jyotsna-pant.blogspot.in/2012/08/tangy-delicious-coconut-chutney.html

Tips:
  • Soak the dal till it becomes soft, if urd dal is soaked for 6-8 hours then the vadas come out fantastic.
  • Add water in little amounts while grinding to make sure the dal paste does not become thin.
  • If the dal mixture will be thin then the vadas will not be made nice. Either they will soak too much oil or they dal mixture will dissolve in oil to small pieces.
  • If the dal paste somehow or other becomes little thin add 2-3 tea spoons of rice powder along with other ingredients.
  • If the oil has become too hot switch off the gas and let it cool for 2-3 min. before making vadas.
  • The Sambhar for vada should be thin so that vadas get soaked properly in it.
Suggested Variations:
  • For those who are allergic to urd dal or urd dal does not agree with their system they can replace urd dal with Moong dal / 50:50 mix of Moong and urd dal mixture.
  • Finely Kadi patta (curry leaves) can be added to the dal paste while making the dal mixture for vada.
  • 1 Tea spoon ajwain (caraway seeds) can be added to the dal paste along with other ingredients while making the dal mixture for vada. This adds flavor and is good for digestion.

LinkWithin

Related Posts Plugin for WordPress, Blogger...