Showing posts with label #Side dish. Show all posts

Saturday, 18 April 2020

Ripe Green Tomato Savory (Hare Tamatar Ki Sabzi)


Ripe Green Tomato Sabzi
I used to see green tomatoes in vegetable shop and used to wonder ‘Why do they pluck tomatoes before they ripen up’. I did not show any interest in those firm, shiny green tomatoes, reason was simple "when I have choice of luscious, red tomatoes then why should I purchase green ones". This was till I did not know the true value of Ripe Green Tomatoes.
These tomatoes are low in calories, rich in potassium, protein, and vitamin A and C. They are also rich source of Iron and Calcium. This variety of tomatoes remains green even after ripening. Thus they are named "Ripe Green Tomatoes".
Years later (Feb 2020) my daughter Namita's friend Deepti Malvadkar brought fresh vegetables and Sapotas from her farm. What do I see? Yes you guessed correctly Ripe green tomatoes! having glowing skin urging me to cook them while they are fresh and nice.
I proceeded to cook them. Hope you all also like the recipe and enjoy the Green Tomato Sabzi.
Preparation Time: 5 minutes
Cooking Time: 10 minutes
Servings: 4 small servings

Nutritional Value Of Sabzi made from 500 gm. Of Ripe Green Tomato (Approx.)
Energy: 135  Cal
Cholesterol:  0
Sodium: 75 mg
Potassium: 1040 mg
Carb: 25.5 gm
Fibers: 5.65gm
Sugars: 24.85gm
Protein: 5.05 gm
Extremely rich in
Vitamin A, C
Calcium and iron
Ingredients Required For Making Ripe Green Tomatoes Sabzi:
  • 500 gm. Ripe Green Tomatoes
Ripe Green Tomatoes
  • 1 Teaspoon Cumin Seeds
  • 1 Teaspoon Fennel seeds
  • 1/2Teaspoon Nigella Seeds
  • 1-2 Green chilies
  • 25 gm Jaggery
  • 1/2Teaspoon Turmeric Powder
  • 1 Teaspoon Coriander Powder
  • 1 Teaspoon Cooking Oil
  • Salt to taste
Direction For Making Ripe Green Tomatoes Sabzi:
  • Wash the tomatoes and cut them to long wedges of half centimeter thickness.
Tomato Wedges
  • Cut onion to long thin slices.
  • Heat oil in a thick bottom wok/pan, when the oil is hot lower the heat and add
    • Nigella seeds
    • Cumin seeds
    • Fennel seeds
  • Once the seeds have spluttered add 
    • Finely chopped Green chilies
    • Finely chopped ginger
    • Finely chopped garlic
    • Onion slices
  • Cook for 2 minutes on medium heat.
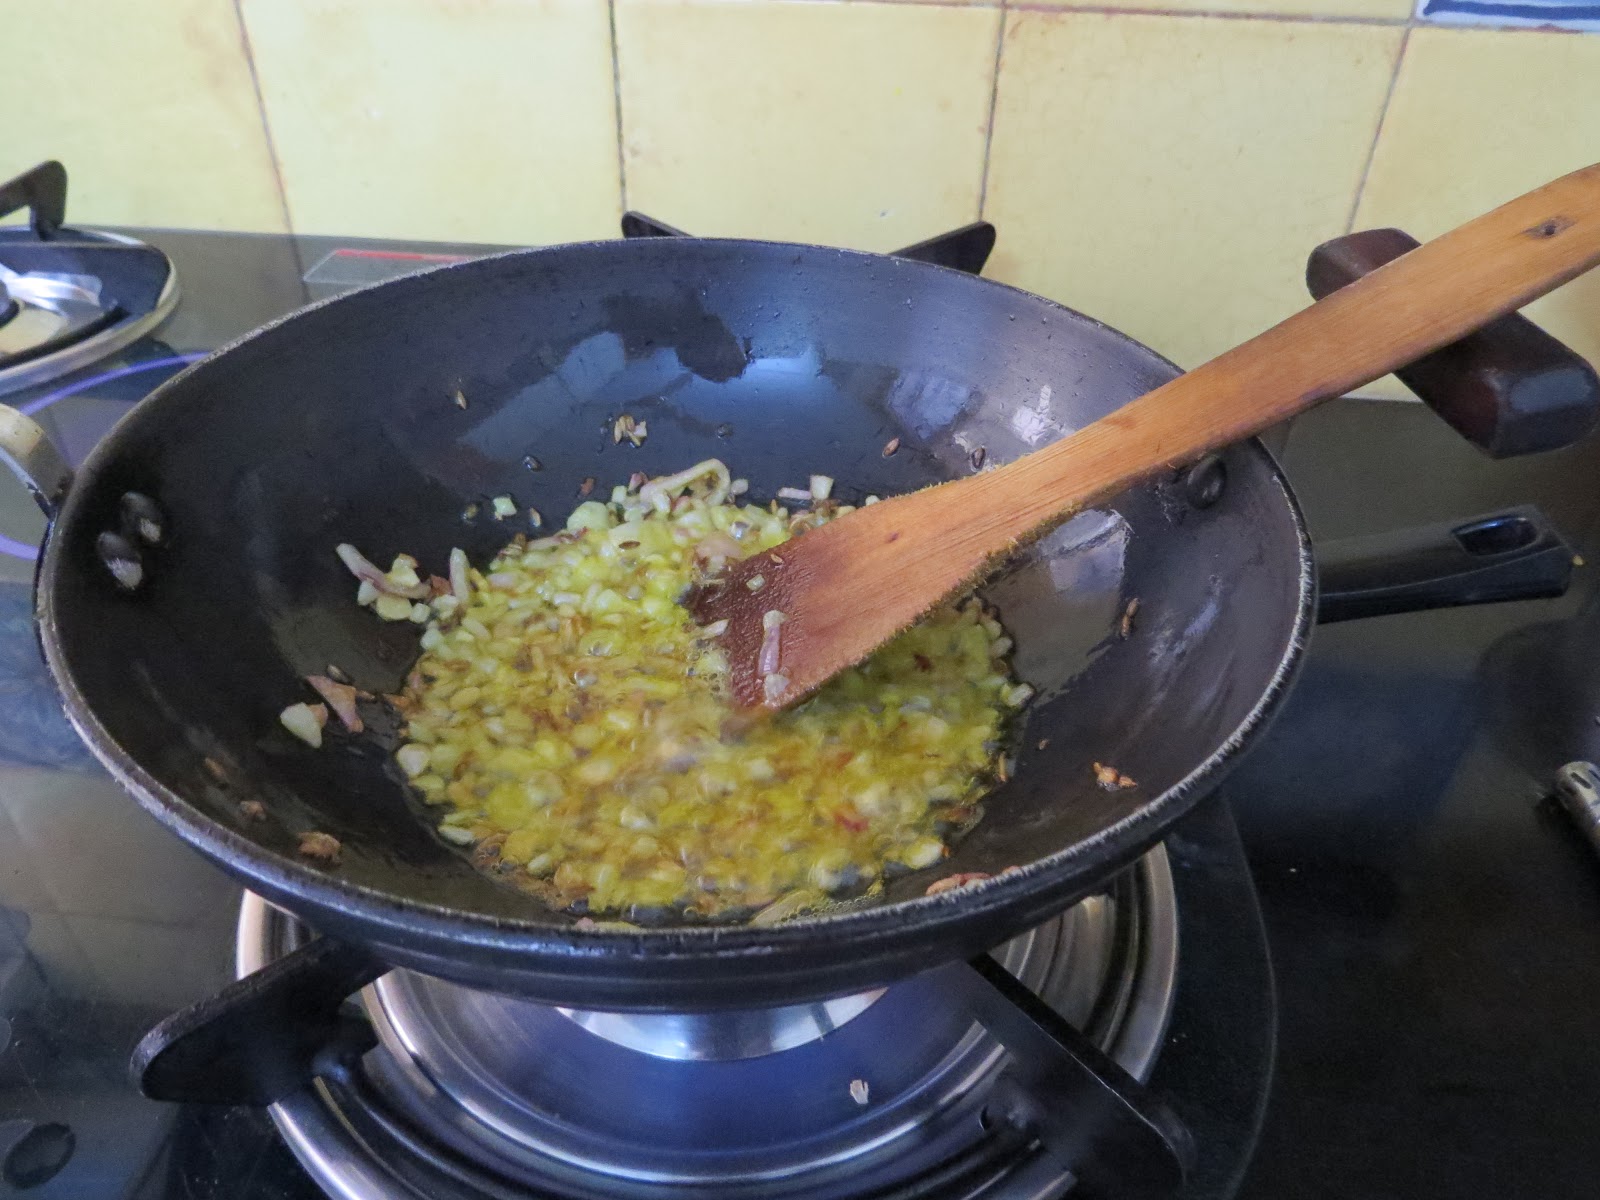
Ready for adding tomato wedges
  • Add tomato wedges and cook for  a minute or so on medium heat. 
Tomato wedges added 
  • Add
    • Turmeric powder
    • Coriander powder
    • Chili powder
    • Salt
Spices added to Tomato wedges
  • Mix nicely and cover the wok/pan.
  • Cook for 5 minutes with stirring in between, making sure tomatoes do not stick to the bottom.
  • The juice of tomatoes is enough to cook them so no extra water is required to be added.
  • After 5 minutes tomatoes will be almost cooked. Add jaggery pieces and mix.
  • Do not cover. Cook with continuous stirring till all jaggery pieces dissolve and get mixed with cooked tomato pieces.
Ready to be served
  • Remove the cooked sweet and sour sabzi in serving dish.
Ripe Green Tomato Sabzi
  • Serve along with da-chawal/parantha/Khichadi/pulav.
  • This sabzi makes amazing side dish.
Tips:
  • Do not over cook, else the sabzi will become gooey.
  • Always check the hotness of green chilies before adding.
  • Break jaggery to small pieces for fast and complete mixing.
Suggested Variations:
  • Coarsely pounded roasted groundnuts can be added to give a different texture and nutty flavor.
  • Organic jaggery can be used. But it will change the color og the sabzi.
  • In the absence of jaggery sugar can be used.

Tuesday, 7 April 2015

Oil Less Green Chili Pickle/हरी मिर्च अदरक का अचार बिना तेल

Oilless Green Chili Pickle
This is one pickle which vanishes fast from the bottle as my whole family is very fond of it. I do not mind as it is very easy to, make and is very healthy. Green chilies have lots of vitamin C, Garlic, caraway seeds(Ajwain) are good for digestion and flatulence and again lemon is rich in Vitamin C and micro nutrients. The sour, hot and tangy taste makes it irresistible.

Preparation Time: 45 min
Maturing time: 7 days in summers
Serving: Makes 400gm. (approx.) pickle.

Ingredients Required For making Oil less Green Chili Pickle:
  • 250 gm. Fresh Green Chilies
  • 10 Lemons
  • 10 Pods of Garlic (optional)
  • 100 gm. Ginger
  • 2-3 Teaspoons Mustard seeds (I use yellow mustard but any other will do)
  • 2-3 Teaspoons Ajwain
  • 2 Teaspoon Turmeric powder
  • 2-3 Teaspoons Vinegar/apple cider
  • Salt to taste
Directions for making Oil less Green Chili Pickle:
  • Grind mustard seeds to coarse powder.
  • Wash green chilies and remove the stalks. Dry them with a cloth and cut to small pieces.
  • Wash and peel ginger. Dry under the sun to ensure all top moisture has evaporated.
  • Cut the peeled ginger to small size pieces.
  • Wash and dry the lemons. Squeeze the juice of lemons leaving two lemons for later use, and cut the lemon rind to long strips.
  • Cut the remaining lemons to small pieces.
  • Peel garlic and cut to long strips.
  • In a stainless container take
    • Green chili pieces
    • Ginger pieces
    • Garlic pieces
    • Lemon and lemon rind pieces
    • Ajwain
    • Mustard seeds powder
    • Salt
    • Turmeric and mix nicely.
    • Vinegar 
  • Cover the container with the pickle mixture with a muslin cloth and keep under the sun for one day in summers and 2-3 days in winter.
  • Transfer the mixture to a clean dry bottle and cover with the lid tightly.
Pickle mauring under the Sun
  • Keep the bottle with the pickle mixture under the sun for 4-5 days and by the end of the week the pickle is ready.
Oilless Green Chili Pickle
Tips:
  • All ingredients should be dry before pickling.
  • Check for any rotten or stained part in garlic, chilies and ginger. It should be removed else the pickle will go bad.
Suggested Variations:
  • If you wish to make this pickle in rainy weather then 20 ml. of vinegar should be added to the mixture along with other ingredients. (I use apple cider).
  • 20-30 gm, Jaggery can be added to get the sweet, sour tangy and hot flavors.

Monday, 29 July 2013

Moong Sprout Ki Sabji (Indian Dry Savory Of Sprout Green Gram)


Sprout Moong Dal Ki Sabji (indian Savory Of Sprout of Green Gram)

Any whole grain when sprouted becomes easier to digest as well as more nutritive because the sprout on the seeds are rich in vitamin B and Vitamin C. Moong dal is very light to digest and thus after sprouting it not only becomes more easy to digest but very nutritive. Sprouts are very good for growing children, pregnant women, and any person recuperating from illness. In Indian especially in Maharashtra sprouts are integral part of food.
Savory of moong sprouts with very little oil and mildly salted and spiced is absolutely delicious and when accompanied with soup and salad makes a complete light, low calorie fat-less meal. The savory can be had for snack with a dash of lemon.
Preparation Time: 5 min
Cooking Time: 5 minutes
Servings: 4 Large Servings
Ingredients Required For Making Moong Sprout Sabji (Indian Savory of Sprouted Whole Green Gram):
  • 150 gm. Whole Green Gram (Moong Dal)
  • 5-6 Curry Leaves (Kadi patta) (optional)
  • 1 Teaspoon Cumin Seeds
  • 1/2Teaspoon Mustard seeds
  • 2 Green Chilies
  • 1/2Lemon
  • Salt to taste
Direction For Making Moong Sprout Ki Sabji:
  • Wash the sprout in flowing water.
Washed Sprouts
  • Remove the seeds from the green chilies and cut them to small pieces.
  • Heat oil in a pressure cooker and when the oil is smoking hot lower the flame and add mustard seeds.
  • When the mustard seeds have spluttered add cumin seeds and pieces of green chilies. Let the cumin seeds splutter and green chili pieces change the color.
  • Add washed sprouts and mix nicely.
  • Add turmeric powder and salt.
Sprouts In Seasoning
  • Mix nicely and close the lid of cooker.
  • Bring the flame to high and cook till pressure is built in the pressure cooker.
  • Put the weight (Whistle) and lower the flame.
  • Cook for 2-3 min. after pressure is built and then remove the cooker from heat.
  • Allow the cooker to cool.
  • Sprouts will keep on cooking by the heat under pressure when the cooker is allowed to cool.
  • Mix the cooked sprouts and take out the cooked sprouts in a serving bowl.
  • Squeeze the lemon and sprinkle the juice on the sprouts.
  • Garnish with coriander sprigs (Cilantro) and fresh green chili.
  • Serve hot as side dish to main course or with soup and salad as main course.
  • Serve with some besan ki sev and finely cut onion and tomato as snack.
Moong Sprouts Ki Sabji
Tips:
  • Always wash sprouts before use.
  • Sprouts should not be over whelmed with strong spices. If done so the delicate flavor of sprouts will be lost.
  • Lemon juice should be added only after cooking not while cooking, if lemon juice is cooked along with food it leaves bitter taste, thus spoiling the taste of food.
  • Do not cook sprouts for long time in cooker; over cooked sprouts do not taste good.
  • Always taste green chilies for hotness before adding and then change the amount of green chilies as per requirement.
Suggested Variations:
  • Mixture of Matki /Moth/Mat/dew beans/Turkish beans, सबूत मसूर /Black lentil/lens culinaris, yellow peas, black gram can be mixed with green gram before soaking, the Sprout of this mixture is extremely tasty and healthy. 
  • Sprouts can be cooked in wok instead of cooker. Time taken for cooking will change from 10 min. to 15 min.
  • Amchur powder can be added instead of lemon juice.
  • 1 finely cut tomato can be added to the oil after the cumin seeds have spluttered, and then sprouts can be added and cooked.
  • To the seasoning add finely cut one onion and cook till transparent. Add finely cut one tomato and cook till soft and then add sprouts and cook till soft (10 min. in wok and 2-3 min. in pressure cooker after the weight is placed)

Wednesday, 3 July 2013

Tomato-Dates Chutney /खजूर और टमाटर की चटनी


Tomato-Dates Chutney
India is a country of chutney, spices, pickles and papads. Go to any part of country different variations of the same will be used as side dish in every and these will be available in every Indian kitchen. We Indians keep on innovating and making more variety of chutney all depending on taste and availability of different ingredients. This is my version of tomato-dates chutney, which has distinct garlic flavor because I am very fond of garlic flavor. I and love to eat with rice/ Roti/ Puri / Bread or with upma / poha ….. Why I like it so much? Well it has all ingredients as far as taste is concerned sour, sweet, spicy, and salt. Color is appealing, taste is superb and as healthy as it can get. It can be kept in fridge for 10-15 days minimum, and if little vinegar is added then for 1-2 months also. Should there be more reason for my liking this chutney.

Preparation Time: 15 min.
Cooking Time: 15 min
Servings: 10-15 small servings (One 200 gm. bottle full)

Ingredients Required For making Tomato-dates Chutney:
  • 250 gm. Red Pulpy Tomatoes
  • !00 gm. Seeds less Dates / 150 gm. Dates with seeds
  • 10-15 Cloves of Garlic (Optional)
  • 4-5 cm. Ginger piece
  • 4-5 Whole Red Chilies
  • 1 Tea spoon Cumin seeds
  • 1 Tea spoon Mustard seeds
  • 1 Tea spoon Red chili Powder (Optional)
  • 100 gm. Tamarind
  • Salt to taste
  • 1 ml / 1/2Tea spoon Olive oil / any cooking oil
Directions For Making Dates-Tomato Chutney:
  • Wash and cut tomatoes to thin long slices.
  • Cut the dates to long thin pieces. If the dates are with seeds then remove the seeds before cutting them.
  • Cut garlic and ginger to small pieces.
  • Break the whole red chilies and remove the seeds.
  • Soak tamarind in 100 ml. water for 30 min. Mash the soaked tamarind and pass through a sieve to remove all solid particles. Collect the pulp in a bowl.
Tomatoes,Garlic,Ginger,Red chilies,Dates and Tamarind pulp for Chutney
  • Heat oil in a wok and when the oil is smoking hot lower the flame and add
    • Mustard seeds
    • Cumin seeds
    • Finely cut garlic and ginger
    • Red chili pieces
  • Cook till garlic starts becoming brown in color.
Spices for seasoning in hot oil
Seasoning Ready for dates to be added
  • Add dates pieces and cook on low flame for 3-4 min. Dates will start drying.
Dates cooked and Now tomatoes to be added
  • Add tomato slices and mix nicely.
  • Cook for 4-5 min. on low flame without covering but with regular stirring.
  • Add
    • Tamarind paste
    • Turmeric powder
    • Salt
    • Red chili powder
  • Mix nicely. 
All ingredients added and cooking
  • Cover and cook on low flame for 5 min with continuous stirring. Tomatoes will get cooked and the juice of tomato and tamarind pulp will mix.
  • Remove the cover. Bring the flame to high and cook till the liquid of the mixture dries up and the mixture starts leaving the edges of the wok. Chutney is ready.
Tomato-Dates Chutney Ready to be served
  • Remove the chutney in airtight container and allow to cool before closing the lid and storing in fridge.
  • This chutney can be kept in fridge for 10-15 days.
  • Enjoy healthy, tasty Tomato-dates chutney as side dish with any meal, have with Dosa / Paranthas or use it for making sandwiches.
Tomato-Dates Chutney
 Tips:
  • Always check the red chili powder / whole red chili for its hot flavor before adding. Increase / decrease the amount according to the nature of the red chilies and your taste.
  • Do not make paste of garlic and ginger. Garlic and ginger pieces taste good in this chutney. If paste is added it will not taste good.
Suggested Variations:
  • 1 tea spoon Urd dal / Chana dal can be added along with mustard seeds and cumin seeds while making the seasoning.
  • 1 Pinch of asafoetida can be added to the seasoning.
  • 5-6 Curry leafs (Kadi patta) can be added to the seasoning.
  • Crushed cashew nut or roasted and crushed ground nut can be added just before removing the chutney from the heat.

Friday, 28 June 2013

Beetroot vegetable /#चुकन्दर की सब्जी (Indian Savory Of Beet Root)


Beet Root Vegetable

Beet root like any other underground vegetable is very rich in Vitamin A. It has its own sugar content which gives it a sweet taste. It is a very healthy vegetable which makes the salads, pickles colorful and tasty. I love beet root boiled and cut to slices, with a pinch of salt. But one preparation I had in house boat in Kerela is one of the best preparations. This is very simple to make, has least amount of oil and absolutely delicious.

Preparation Time: 10 min.
Cooking Time: 10 min
Servings: 4 Medium Servings

Ingredients Required For making Beet Root vegetable:
  • 250 gm. Beet root
  • 2-3 Green chilies
  • 1/2teaspoon Mustard seeds
  • 1/2Teaspoon Cumin seeds
  • 1 Pinch Asafoetida
  • Salt to taste
  • 1/2 1 ml. Olive oil / any cooking oil
Directions For making Beet Root Vegetable:
  • Wash and boil whole beet root till it is tender. (5 min. in cooker after pressure is built in cooker / 15-20 min. in open vessel)
  • Remove the seeds from green chilies and cut them finely.
  • Cool the boiled beet root.
  • Peel and grate the boiled beet root.
Boiled,Peeled and Grated Beet Root
  • Heat oil in a wok till oil is smoking hot.
  • Add
    • Mustard seeds
    • Cumin seeds
    • Finely cut green chilies
    • Asafoetida
Seasoning (Tadka) for Beet Root Vegetable
  • Let the seeds splutter. (it will take 30-40 sec.)
  • Add grated beet root and mix nicely.
  • Add salt and mix.
  • Cover and cook on low flame for 5 min with stirring two /three time in between.
  • Remove the wok from heat and add lemon juice and mix. Cover and keep for 2-3 min. This will ensure the mixing of lemon juice in the beet root.
Beet Root Vegetable Ready to be Served
  • Take out in a serving bowl and garnish with mint/cilantro.
Beet Root Vegetable
  • Serve with hot rice / roti / Appam.
Tips:
  • Beet root does not become soft like potato when boiled. The texture and hardness of beet root changes once it is boiled. Do not fear if it is boiled for slightly longer or lesser time.
  • Lemon juice should be added once the vegetable is cooked. Lemon juice if cooked it turns bitter.
Suggested Variations:
  • Boiled beet root can be cut to thin slices and then cooked.
  • Amchur can be added instead of lemon juice. If amchur is added then it should be added along with salt.

LinkWithin

Related Posts Plugin for WordPress, Blogger...