Showing posts with label Snacks. Show all posts

Friday, 21 May 2021

Mix Daal Vada/मिली जुली दाल का वाडा (Indian Patties of Mixed Pulses)

Mixed Daal Vada 
Vada is sort of flattened vegetarian patties sometimes with a hole in centre like doughnut. These vadas are taken as snacks, side dish and are very popular street food in India. Chana daal vada is one such vada which is very popular in Maharashtra. I took a cue from this street food and thought of making something different, and the result was Mix Daal Vada. It is extremely tasty, crisp from outside and soft moist from inside. This vada like other vadas can be had as snacks with tea /coffee, make it small bite size and enjoy it with cocktails, or serve it as side dish with roti-sabzi/daal-chawal. Green chutney of coriander leaves - mint goes best with it. 

Preparation Time: 4 to 5 hrs soaking time,
30 minutes grinding, chopping
Cooking Time: 15 minutes /batch
Serves: Makes 30 to 35 medium size vadas
Ingredients Required for Making Mixed-Daal-Vada:
  • Chana daal(चना दाल) :100 gm 
  • Bengal gram (साबुत काला चना):25 gm
  • Split skinned black gram(धुली उडद दाल): 25 gm
  • Split skinned Pegion peas (अरहर /तूर दाल):25 gm
  • Medium size green chilies (हरी मिर्च) : 4
  • Finely chopped ginger (अदरक): 4 Teaspopns
  • Finely chopped Onion:8 Tablespoons
Few Chopped Ingredients 
  • Red Chili Powder(लाल मिर्च पाउडर) (optional): 1 Table spoon
  • Rice flour(चावल का  आटा): 5 Tablespoons 
  • Salt (नमक) or to taste: 2 Teaspoon /to taste 
  • Roasted Cumin seeds powder :1Teaspoon
  • Carrom Seeds ( अज्वाइन): 1 Teaspoon
  • Curry leaves(कड़ी पत्ता):15 तो 20
  • Fresh Coriander Sprigs: 4 or 5 
  • Oil for frying
Directions for Making Mixed Daal Vada:
  • Mix all daal and wash them thoroughly till milky water stops coming as washing.
  • Soak the washed mixture of daal in fresh water for minimum 4 to 5 hrs.(more the better). 
Soaked Daal Mixture 
  • Once daal mixture is soaked drain all water and grind the soaked daal coarsely. Water is not required to be added while grinding.
Daal Paste 
Coarse Paste od Daal Mixture
  • To the mixture coarse daal paste add rice flour and mix nicely. This mixture can be stored in fridge for 2-3 days.
Mixture of Daal paste and Rice flour 

  • To the daal paste and rice flour mixture add:
    • Finely chopped Onion
    • Finely chopped ginger
    • Finely chopped green chilies
    • Chopped curry leaves
    • Chopped coriander sprigs 
    • Red chili powder
    • Carrom seeds
    • Cumin powder 
    • Salt
Onion and spices added to mixture 
  • Mix nicely and let it stand for 5minutes for rice flour to absorb the moisture and spices to release flavor. 
  • Mix again and make round balls of the size you want.
Consistency of Mixture for Vada 
Vada Ready for Frying 
  • Flatten the round balls of mixture to give half centimeter (approx) thick patti shape. 
  • Heat oil in a thick bottom wok/frying pan. When the oil is hot (not smoking hot) out the flattened patties in the hot oil. Bring the heat to medium and fry turning them over once or twice, till the patties /vadas become crisp and golden brown on both sides.
Vada Frying on low flame 
Vada Being Fried to Golden Brown Color 
Mixed Daal Vada 
  • Enjoy crisp, center moist, hot tasty vadas with mango chutney/coconut chutney / dhaniya - pudina chutney. Or Roasted Tomato Chutney. 
https://jyotsna-pant.blogspot.com/2021/06/roasted-tomato-chutney.html?m=1
Tips:
  • Do not add water while grinding the soaked. A well soaked daal mixture will not require water for coarse grinding. If water is added then the paste consistency will not be correct and excess of rice flour will be required to rectify it, this will spoil the taste of vada. 
  • Once salt is added then do not store it because salt will cause onion to release water thus thinning the consistency of vada mixture. 
  • Oil should never be smoking hot. If heated excessively switch off the heat and allow it to cool. 
  • Frying should be done on low /mediul heat depending upon your stove but never on high heat. 
  • High heat frying will make the vadas dark from outside but will be raw from inside. 
  • Vadas should not be too thick for crisp outside and well cooked moist inner core. 
Suggested Variations:
  • Add 2-3 teaspoons of black /white sesame seeds to the vada mixture.
  • Coarsely ground groundnuts can be added to the vada mixture. 
  • To the mixture of daal 20 gm Moth daal and or 20 gm whole black lentil can be added then soaked. This adds flavor and taste to vada. 

Saturday, 23 April 2016

Whole Wheat Flour Pineapple cake


Pineapple Cake


Whenever I pass near the cart selling ripe juicy pine apple I cannot but resist of thinking of Pineapple cake. The one we get in market are full of artificial flavor and color which desists me from buying them from bakery. I love my food as far as possible free of chemicals which are harmful and add no value to the food we eat. The cake which I am presenting today is free of artificial flavor and color. It is made in whole wheat flour, chunks of pineapple and juice of pineapple thus is packed with nutrients and fibers. The color may not look as good as you get in bakeries or are sold by many home bakers but the taste is certainly better and it will be guilt free eating as you will know that it is not going to cause any harm to you and your loved ones as it is free of artificial color and flavor.

Preparation Time: 30 minutes
Baking Time: 40-45 minutes
Servings: makes 750 g. cake (approx.)

Nutritional value: (Approx.)
  • Energy 2000 Cal
  • Fat: 100gm
  • Cholesterol: 775mg
  • Sodium: 200mg
  • Potassium: 1100mg
  • Carbs: 125 gm
  • Fibers: 39gm
  • Sugar: 100gm
  • Protein: 24g
  • Vitamin A, Vitamin C, calcium, Iron
Ingredients Required For making Pineapple Cake:
  • 150 gm. Whole wheat flour
  • 3 Medium size eggs
  • 1 Teaspoon baking Powder
  • 1/2Teaspoon baking soda
  • 100 gm. Butter (I use Nutrelite butter)
  • 1 Pinch of Salt (If using white/unsalted butter)
  • 150 gm. Castor sugar (I prefer less sweet so use 100 gm. only)
  • 200 gm. Diced pieces of Pineapple
  • 150-200 ml. Fresh Pineapple pulp
Directions For making Pineapple cake:
  • Remove all peel and spiky things from pineapple.
  • Cut the pineapple to slices and core the slices.
  • Cut the slices to 1cm (Approx.) pieces.
Pieces of Pineapple for Cake
  • Keep 200 gm of the pieces away for further use.
  • Pulse the remaining slices and the core of pineapple to get thick pulp.
  • Mix
    • Flour
    • Baking powder
    • Baking soda
    • Pinch of salt (if using unsalted butter)
  • Sieve 3-4 times.
  • Separate egg whites from egg yolk.
  • Whisk egg white to stiff peaks.
Whisked Egg White
  • Cut the chilled butter to small cubes and add sugar to it.
  • Whisk till it becomes creamy.
  • Add egg yolks one at a time and whisk to get frothy, creamy mixture of butter, sugar and egg yolk.
Creamy mixture ready for Flour and Pineapple
  • Add the pieces of pineapple to flour and mix so that all pieces get coated with flour mix.
Pineapple pieces in Flour mixture of Cake
  • To the (butter + sugar + egg yolk mixture) add (flour + pineapple mixture) and whisked egg whites alternately and after each addition of flour/egg white mix with very light hands using either wooden spoon/fork or your fingers.
  • Add pineapple paste in two instalments. Mix after each addition. Depending upon your batter thickness the pineapple paste requirement may change.
  • The last step should be finished fast as the acid of pineapple reacts with baking soda and baking powder.
  • The batter should be pourable but not runny or thick which does not get poured.
  • Pour the batter in the prepared baking pan.
  • Tap two three times to level the surface and remove the trapped air bubbles.
  • Bake at 180oC for about 35-40 minutes, or till the cake is done. Check for the doneness of cake by poking a clean skewer in the cake, if it comes out clean cake is baked.
Baking at 180 C
  • Remove the cake from oven and cool it in the rake. Cake is ready.
Pineapple cake
  • Cut the cake when it is cooled.
Soft Moist Pineapple cake
Enjoy the fruity, chemical free pineapple cake with tea/coffee.
Tips:
  • The size of the eggs thus the liquid content provided by them differ thus the amount of pineapple pulp required may change. Always check the consistency of batter before adding all pulp.
  • Eggs and butter should be at the same temperature (Approx.), else curdling occurs.
  • If ever the butter eggyoly mixture starts curdling then do not worry either keep working with it or add just a spoon of flour and whisk. 
  • The baking time varies with the type of oven used. Keep checking for doneness of cake after 30 minutes.
  • If you desire to have the cake pieces cut too evenly then dice the pineapple to small pieces. I love chunks of pineapple in cake.
  • To get the yellow color and strong flavor you may use one drop of yellow color and 2-3 drops of pineapple flavor any good brand.
  • Whole wheat flour can be replaced by refined white flour (Maida/all-purpose flour). The cake comes out softer and lighter. I prefer whole wheat flour as it is more nutritious and has lots of fibers.
  • Place a small bowl with chilled water at the bottom rake of oven while baking the cake this will make sure the top crust does not become hard.
  • If the cake is not done but the top is becoming darker, just cover it with a tin foil and bake till done.
Suggested Variations:
  • Butter can be rerplaced by olive oil to get less fatty and less cholesterol content in cake. For replacement of butter amount to oil always use 100:60 ratio of butter to oil because butter has water content which is lacking in oil.
  • If fresh fruit is not available then tinned pineapple can be used. 4-5 pieces can be diced and 5-6 pieces can be made to pulp. Artificial flavor and color is must if using tinned pineapple.
  • Whole wheat flour can be replaced by all-purpose flour. If using all-purpose flour then replace the baking soda by baking powder (1+1/2) the cake will certainly will be lighter and less dense but the goodness of fibers and nutrients will be missing from the cake.
  • Use 50 gm. less sugar and soak the cake with the sugar syrup of tinned peneapple this will add sweetness with pineapple flavor.

Friday, 11 May 2012

Lazzatdar Kebab/chana kebab / काले चने के कबाब (Kebab Of Kala Chana)


Pan Fried Lazzatdar Kebab
Fried Lazzatdar Kebab
These are the Kebabs which melt in mouth and nutrition wise as well as taste wise are the best replacement for mutton Kebabs for vegetarians. I learnt them when I was doing MSc. way back in 1976.
My brother who was doing his MBBs came to Almora with his friend and I wanted to give a day off to my mom from kitchen and make something else than the regular food, so my friend's mom taught me how to make Lazzatdar Kebab. These lazzatdar kebabs  served with coriander mint chutney were so good that my brother as well as his friend could not believe that they are not mutton kebab! And best part is that my mom also could eat them as they were pure vegetarian kebabs.
It was real delight to see her enjoying these kebabs, because it was always she used to cook and we used to enjoy the fruits of her hard work.

Preparation Time: 30 – 40 min.
Cooking Time: 20-30 min.
Servings: 8-10 Medium size Kebabs

Ingredients required for making Lazzatdar Kebabs;
  • 250gm. Kala Chana (Black Gram)
  • 2 Medium size Potatoes
  • 2 medium size Onions
  • 2 Fresh Green Chilies
  • 1 Inch piece of Ginger
  • 5-6 Cloves of Garlic (optional)
  • 5-6 Sprigs of Fresh Green leaves of Coriander.
  • 2 Tea spoon Garam Masala
  • 2 Tea spoon Red chili powder (or to taste)
  • 2 Tea spoon Amchur powder.
  • Salt to taste
  • 4-5 Tea spoons of Olive oil (or any other cooking oil)
Direction for Making Lazzatdar Kebabs:
  • Wash and soak kala chana in water over night.
  • Drain out the water in which kala chana was soaked overnight.
  • Wash the soaked chana nicely.
  • Put soaked chana in a cooker, add 200 ml. water and one tea spoon salt, close the lid.
  • Keep the cooker on high flame till pressure builds in the cooker.
  • Lower the flame when pressure builds in the cooker and cook for at least 15min. to make sure that chana is cooked to softness.
  • Remove the cooker from gas and allow it to cool.
Boiled Kala Chana
  • Boil potatoes and peel them. Keep aside.
Boiled and peeled Potatoes
  • Cut onions finely
Finely cut onions
  • Cut green chilies finely.
Finely cut Green Chilies
  • Cut garlic finely
Finely cut Garlic
  • Wash and drain water from coriander leaves and cut them finely.
Finely cut Green Coriander Leaves
  • Grate the ginger piece.
  • Cook the boiled Chana till its juices dry up but yet remains moist or drain juices from boiled chana completely. Draining juices reduces the flavor.
  • Peel boiled potatoes and keep aside.
  • Mash boiled chana with your fingers nicely till not even a single whole chana is left. Or simply grind it in mixer "Without adding water.
ashed boiled Kala Chana
  • Add to the mashed chana
    • Finely cut onions
    • Finely cut garlic
    • Grated ginger
    • Finely cut green chilies
    • Finely cut coriander leaves
    • Garam masala
    • Red chili powder
    • Amchur
    • Salt
    • Boiled potatoes
Mash boiled Kala chana with coriander leaves, onions, garlic, green chili, garam masala, red chili powder,ginger, amchur and salt
Boiled and broken potatoes with rest of the ingredients
  • Mix all ingredients with regular mashing of potatoes till the mixture becomes homogenous dough.
Dough of kala chana with rest of the ingredients ready for making Kebabs
  • Make balls from the dough mixture of required size and flatten them between your palms.
Dough of kebabs made to round of required size
  •   Keep a non- stick tawa on gas on high flame and spread one tea spoon of oil on it.
Non stick Tawa being heated with spoon full of olive oil
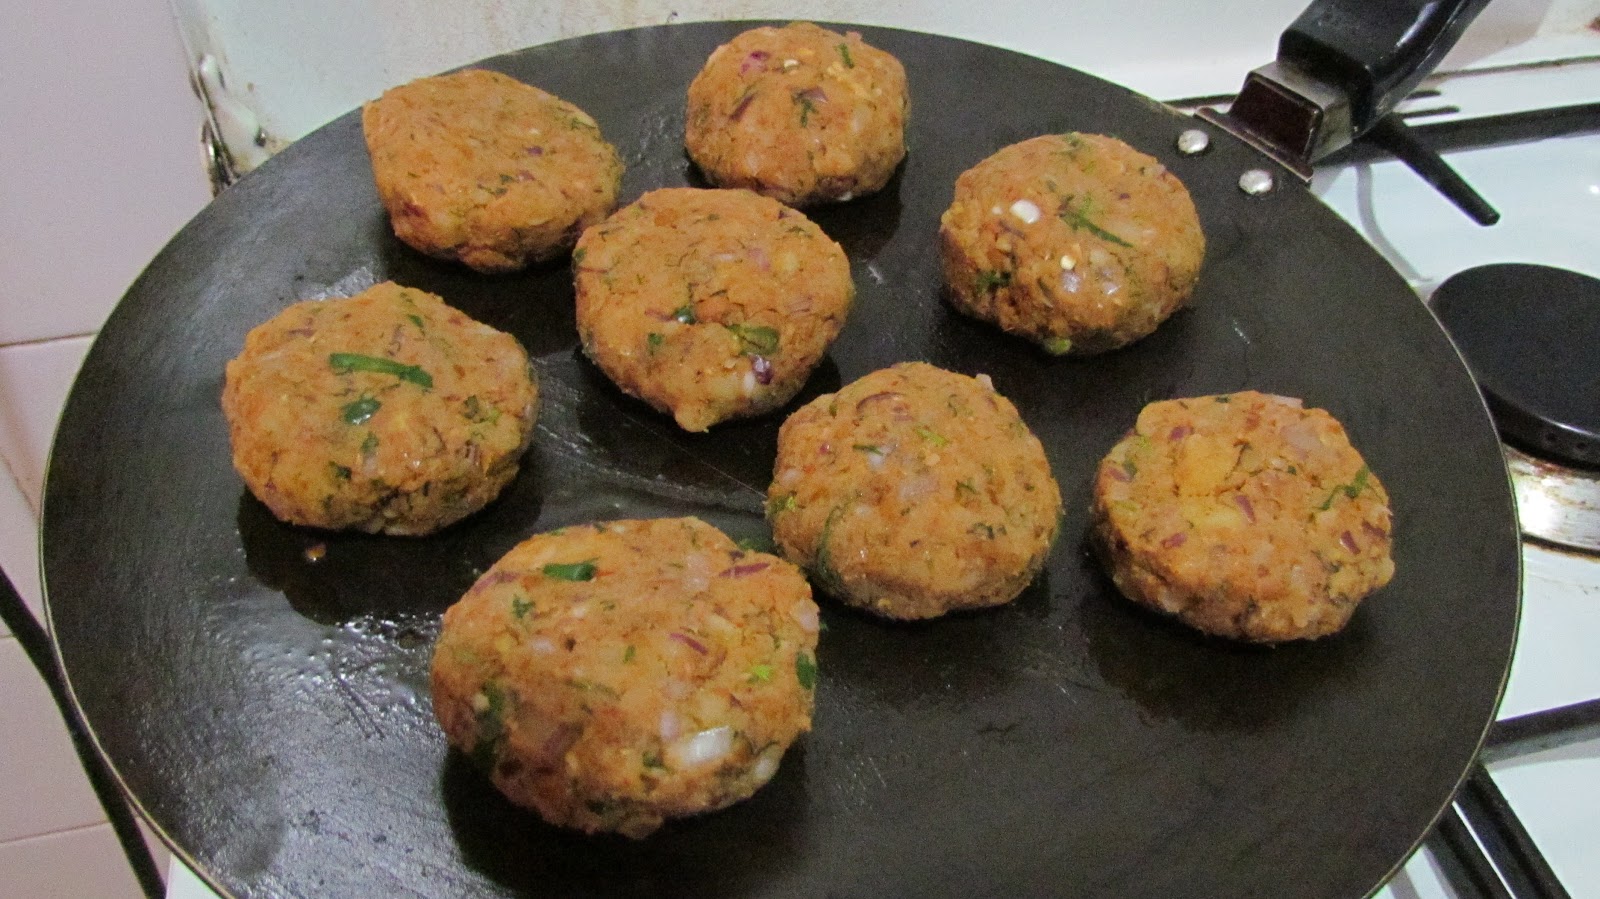
  •   When the tawa becomes hot lower the flame and keep the flattened balls on the tawa.
Kebabs being cooked on tawa
  • Sprinkle one tea spoon oil from side of kebabs.
  • Cook on low flame till one side is golden brown.
  • Turn the kebabs upside down and sprinkle 1-2 teaspoon of oil and cook till other side is also golden 
Turned upside down and being cooked on the other side
  • Serve hot Lazzatdar Kebabs with coriander mint chutney and ringlets of onions as snacks, side dish to main course.
Pan Fried Lazzatdar Kebab with Coriander-Mint chutney
                http://jyotsna-pant.blogspot.com/2011/10/green-coriander-and-mint-chutney.html
             http://jyotsna-pant.blogspot.com/2012/06/hariyali-chutney-raw-mango-chutney.html
  • These Kebabs go very well with Roomali roti, bread and hot buttered buns.
Pan fried Lazzatdar Kebab , Coriander-Mint chutney and Hot buttered Bun
Tips:
  • Make sure chana is boiled to softness.
  • Make sure boiled chana is mashed completely.
  • Do not add water if using grinder/mixer while grinding boiled Chana .
  • Make sure potatoes are mashed completely in the mixture of kebab.
  • If you have drained the liquid from boiled Chana then it can be used as soup with a dash of lemon juice and pepper powder.
Suggested Variations:
  • Powdered, soaked soya beans nuggets (Nutrela) can be added to the mixture. It enhances the taste as well as nutrition value as soya beans are rich in protein.
  • If you prefer deep fried Kebabs then add 50 gm. corn flour to the mixture and also coat the flattened balls with corn flour before frying.

Balls for Kebab rolled in Corn flour
Lazzatdar Kebab (Fried)
  • Corn flour can be replaced by bread crumbs.
  • Those who do not take onions and garlic can replace onions and garlic by ginger, and potatoes.
  • Place one kebab, some salad leaves, onion ringlets, tomato ringlets, on a buttered slice of bread. Sprinkle sauce of your liking and place another slice of bread on the top of it or put them in a burger bun and  vegetarian burger is ready.

Tuesday, 29 November 2011

Missi Puri ( Puri made of different flour mixtures)

These puris are quite popular in Maharashtra (India). They can be served as evening snacks or as main dish accompanied with vegetables or chicken / mutton. It was in the home of my good friend Mrs. Deshmukh where I ate them for the first time. After learning how to make them, I made them at home, and my family started loving Mrs. Deshmukh more for teaching me Missi puri. Since the puris have different cereals in them they make complete food with any type of accompaniment. My husband loves them with thick curd seasoned with little salt and finely cut green chili.

Preparation Time: 10min.
Cooking Time: 15 min.
Servings: The below given material will make 15 puris.

Ingredients Required
  • 50gm. Whole Wheat Flour
  • 25gm. Semolina (Suji).
  • 25gm. Rice Flour.
  • 25gm. Black Gram flour.(Besan).
  • 25gm. Millet Flour (Bajara Atta.)
  • 25gm. Jowar Flour
  • 1/2 Tea spoon Salt.
  • 1/2 Tea spoon Red chili powder.
  • 10 ml. Cooking Oil for making dough.
  • 100ml. Water for making dough.
  • 200ml. Cooking oil for frying.
Directions To Make The Dough
  • In a bowl take wheat flour, suji, rice flour, besan, bajara atta, jowar atta, salt, red chili powder and mix thoroughly.
  • Add 10ml. of cooking oil in little proportions with continuous mixing.
  • Mix the mixture by rubbing between your palms.
  • The mixture should resemble bread crumbs.
  • Add water in small proportions and knead. 
  • The dough should be firm but soft.
  • Keep the dough aside for 5 – 10 min.
Directions To Make Missi Purees
  • Take 200ml. cooking oil in a wok and heat it on high flame.
  • Lower the flame to minimum when the oil is smoking hot.
  • Oil the rolling board and rolling pin with few drops of oil.
  • Make 15 rounds balls from the dough.
  • Keep one ball of dough in the center of rolling board and roll it to 6 -8 cm. diameter round.
  • Put it gently in the hot oil from the edge of wok and fry on both sides to golden brown color.
  • Repeat the same with all the balls of dough.
Hot crisp Missi purees are ready. These purees can be kept in air tight containers for a day or two. My personal favorite is the combination of Missi puri with hot and spicy mutton.

Tips:-
  • Always add water in little proportions because excess of water will make any type of puri’s dough suitable to make chapatti not puri.
  • Puri dough should always be firm but soft.
  • You can use your own imagination and add some Methi, Palak, finely cut coriander leaves for variation in Missi puri.
  • While frying puri make sure the rolled puri is placed from the edge of wok else hot oil will spill causing burns.

Tuesday, 27 September 2011

Banana Cutlets/Banana kebab /केले के कबाब (Less fat,Nutritious Snack of Raw Banana)

Banana Cutlets
Banana is very rich in vitamin c, carbohydrates and many micro nutrients. Banana in ripe or raw form can be made to different delicacies. Raw banana vegetable and cutlets are my favorite. Pan fried banana cutlets have very less oil and are very healthy as well as tasty. These cutlets can be taken as snacks, in vegetable burgers, or simply placed between two toasted bread pieces along with chutney and sauce for breakfast. Mothers of small children should make these at home and make the burgers which children love so much.

Preparation Time: 15 min.
Cooking Time :30 min.
Servings: 10-12 medium size cutlets

Nutritional Value : (Approx. value for total cutlets made from 6 medium size bananas (120 gm eac approx.))
Calories: 675  
Carbs: 185 gm.
Sugar: 200 gm.
Protein: 10 gm.
Sodium: 550 mg.
Pottassium: 2.5 gm.
Fat: 4 gm.
Cholesterol: 0 
Dietary fibers: 22 gm.
Rich source of Vitamin A,B6, C and A.
Rich in Micro nutrient Potassium,Iron,Calcium and Zinc.

Ingredients for Making Banana Cutlets:
  • 6 Raw Medium size Bananas (My banasnas weighed 650 gm total)
Raw Bananas
  • 2 Medium size Potatoes
  • 1 large onion(optional)
  • 2 Green chilies
  • 2-3 Sprigs of Coriander leaves(optional)
  • 1 Tea spoon Red chili Powder
  • 1 Tea spoon Garam Masala
  • 1/4Tea spoon Turmeric Powder
  • 1 Tea spoon grated Ginger
  • 1 Tea spoon Amchur Powder
  • Salt to taste
  • Olive oil / any cooking oil of your preference
Direction for Making Banana Cutlets:
Boil bananas with the peeling till the banana peel crack.
Boiled bananas
Oeeled Boiled Bananas
  •  Allow to cool.
  • When boiled bananas get cool remove the peel and mash them.
Mashed Boiled bananas
  • Boil Potatoes. Peel the boiled potatoes and mash them.
Mashed Boiled Potatoes
  • Wash and cut the coriander sprigs fine.
  • Cut green chilies fine.
  • Cut onions fine.
Finely chopped Onions
Potatoes and Basnanas mash  
  • Take
    • Mashed potatoes
    • Mashed Bananas
    • Onions(optional)
    • Green chilies
    • Coriander(0ptional)
    • Red chili powder
    • Garam Masala
    • Amchur
    • Salt
  • Mix all in gradients to homogenous and smooth dough.
Mashed bananas, Potatoes and all spices
Mixture for Banana Cutlets
  • Make balls from the mixture of cutlets and flatten them by pressing between your palms.
  • Roll the flattened ball in corn flour and keep aside for corn flour to stick to the surface.
  • Heat a non-stick tawa / pan with 1 teaspoon oil on low flame.
  • When sufficiently hot place the flattened balls on the tawa and cook on low flame.
  • Sprinkle 2-3 drops of oil on each cutlet and cook till brown.
  • Turn the cutlets and cook on the other side also.
  • Sprinkle 2-3 drops oil twice while cooking on the flip side.
Banana Cutlets being cooked with Mininum Oil
  • Remove when brown from both sides in a serving bowl and enjoy with chutney
Banana Cutlets Seved with Hariyali Chutney
Tips:
  • When banana peel splits immediately remove the bananas from boiling water.
  • Boil potatoes to firmness.
  • Add salt after mixing all ingredients to make sure the mixture for cutlets remains firm.
  • Do not make the mixture and keep for long time.
  • If you want to make the cutlet mixture in advance then add salt only at the time of making the cutlets.
Suggested Variations:
  • Omit potatoes from the ingredients to make these Cutlets #Diabetic friendly.
  • Coriander sprigs can be replaced with celery / parsley / thyme / oregano / basil.
  • Bread crumbs can be added to the mixture of cutlets. If 5-6 tea spoons of bread crumbs are added to the cutlet mixture then corn flour is not required for coating the cutlets.
  • Finely cut nuts can be added to the mixture of cutlet.
  • Corn flour can be replaced with rice flour.
  • 3-4 Tea spoons of corn flour can be added to the mixture and kneaded to smooth dough. This will eliminate rolling the balls for cutlets in corn flour.

LinkWithin

Related Posts Plugin for WordPress, Blogger...