Showing posts with label Helpful kitchen tips. Show all posts

Thursday, 7 November 2013

Pyaz Masala (Onion-Garlic-Ginger paste)

Onion-Ginger-Garlic Masala
When we are in hurry or tired and food is to be cooked masala ready in the fridge comes in handy. Any gravy with onion in it requires maximum time for making the onion masala. Ginger-garlic paste can be made and kept in fridge and if the onion masala is ready then work becomes very easy. I prefer keeping in fridge two masala always ready, one of only onion and other of onion tomato and of course ginger-garlic paste is also home made. http://jyotsna-pant.blogspot.com/2012/11/home-made-ginger-garlic-paste.html  . When the onion masala is made in large amount then it saves not only time but the usage of oil also reduces very much.
Onion-ginger-garlic can be cooked to make darker paste which can be added directly to the chana, rajama etc. or can be cooked to slightly less extent which can be fried/roasted in tempered oil alongwith mutton. I prefer lesser cooked (shown in the end) for chicken and mutton and more cooked (darker one) for chana/rajma....
Preparation Time: 15 minutes
Cooking Time: 20-25 minutes
Serving: Makes almost 1.3 kg masala
Ingredients Required For Making Onion Masala:
  • 1 Kg. Onion
  • 200 gm. Garlic
  • 200 gm. Ginger
  • 10 ml. Oil
  • 1 Teaspoon Salt
Directions For making Onion-Tomato Masala:
  • Peel and cut onions to long 2-3 mm. thick slices
  • Peel garlic.
  • Peel ginger and cut to pieces.
  • In a thick bottom wok take 10 ml.oil and heat it. When the oil is hot add
    • Onions
    • Garlic
    • Ginger 
Onion Garlic Ginger in oil
  • Bring the heat to low, add 1 teaspoon salt, cover and cook for 5 minutes.onions will start wilting and the mixture will become sggy.
  • Cook for another 15-20 minutes with regular stirring and turning. The onion will become light brown in color.
Ready For Making Paste
  • Switch off the gas and allow it to cool without lid.
  • Take the cooked mixture in mixer/grinder and make fine paste. Normally water is not required but if required then add little water to make fine paste.
  • Store the masala in an airtight container for future use in fridge. It can be stored in freezer for more than a month .

Tips:
  • Always use thick bottom wok otherwise the mixture will start becoming brown before the onions are cooked thus rendering raw onion taste to the masala.
  • Do not cut the onions too thick this will make proper cooking of onions difficult.
  • Cook the masala on low flame this will allow all ingredients to cook properly.
Alternate Suggestion:
  • Onions can be cut to smaller pieces for fast cooking.
  • Garlic and ginger paste can be added instead of ginger and garlic pieces.
  • Cooked masala can be stored in container or made to cubes by freezing it in ice tray. Cubes are easier to store and easy to use.
  • Masala can be cooked to lesser extent (Switching off the heat when the onions just start to get brown hew) and stored. While making chicken / mutton ,masala requires to be cooked in tempered oil along with mutton and chicken, the masala cooked to lesser extent as shown in picture below is best.
Onion-Garlic-Ginger Paste

Thursday, 17 October 2013

How To Make Moongodi / मुंगोड़ी बनाने का तरीका (Moong Dal Badi / Wadi / Bari)


 Moongodi of Split Green Gram with Cover removed (Badi of Dhuli Moong Dal)
 Chilke wali dal ki Moongodi (Badi of Split Green Gram)

Moong dal is very tasty, nutritious and easy to digest. It is very rich in protein and if moong dal with its green cover / whole moong dal is used then its nutritional value increases many folds as the minerals and vitamins remain intact with the cover. Whole moong dal is sprouted and the sprouts are extremely healthy,  and apart from protein and minerals it becomes very rich in Vitamin C. Mungodi is one of the many ways moong dal can be included I the diet.  Mungodi is made to vegetable exactly like Badi / Vadi / Bari. Mungodi is a wonderful variation of moong dal savory and can be had with roti / parantha / rice. Mungodi fried or roasted with 2-3 drops of oil (Microwave) is a wonderful appetizer. My husband loves all form of Mungodi, thus I always stock it by making Mungodi at home.

Preparation Time: 2-3 hours (15 min. for grinding to paste, rest soaking time)
Making Time: 15 minutes
Drying Time: 1-2 days (Depends on the weather)
Servings: makes 250 gm. Mungodi

Ingredients required For Making Mungodi:
  • 250 gm. Chilke Wali Moong dal / Dhuli Moong dal (Moong dal with green cover (Split Green gram / or yellow moong dal (Split Green gram with cover removed)
     Moong dal (Green Gram)
  • Water
Directions For Making Mungodi (Moong Dal Badi / Vadi / Bari):
  • Wash moong dal nicely and soak it in excess of water for 2-3 hrs.minimum. (Can be soaked for 6-8 hrs.)
  • Drain excess water and grind the dal to thick paste in a grinder-mixer. If water is required while grinding then it should be added in very very small proportions as moong dal grinds easily and quick.
  • The paste should be thick.
Paste of Moong Dal With Green Cover (Split Green gram paste)
Paste of Dhuli Moong dal (Split green gram with its green cover removed)
  • Take a steel plate/ plastic sheet. Oil the plate, not the plastic sheet.
  • Take the dal paste in your fingers and using the thumb drop them to small rounds.
Paste of Moong Dal made to small rounds
  • Each portion of paste put on the plate/sheet should be at 2-3 mm. distance from each other.
  • Keep the plate/ sheet with wet moongodi under the sun for drying.
Moongodi drying under the sun
Moongodi drying the sun
  • It will take two days if the temperature is 25-35oC and one day if the temperature is 35-45oC.
  • Nicely scrape the almost dried moongodi from the surface on which they are drying.
  • Turn them upside down and allow to dry for one day if the temperature is low else 4-5 hrs, of hot sun drying is enough.
Moongodi scraped from the plate and kept for drying
Ready for storing
  • Store the dried moongodi in a airtight container / zip pouch.
  • Make vegetable of Moongodi or just take handful moongodi add 3-4 drops of oil. Mix so that oil is coated on all moongodi. Micro wave them for just 30 sec. Turn them upside down with the help of spoon. Microwave for 30 sec. They will become golden brown. Sprinkle salt pepper/ red chili powder. Enjoy as snacks  appetizer with cocktails. 
Tips:
  • Do not add strong smelling spices in dal paste of moongodi as the subtle flavor of moongodi will be over powered by them.
  • Dal should be soaked nicely. When the soaked dal is pressed with finger nail it should be soft enough to break.
  • Paste of soaked dal should be thick.
  • Do not add water in large portions while grinding, add only when required, that also in very small portions.
  • Scrape the moongodi from the plate / plastic sheet only when it is dry else it will get mashed to pulp and become useless.
Suggested variations:
  • Finely cut coriander sprigs / spinach / green chilies can be added to the dal paste before making moongodi.
  • Red chili flakes can be added to the dal paste.

How To Make Authentic North Indian Garam Masala


Garam Masala

Garam masala is a mixture of different Indian spices. In those places where weather is cold almost throughout the year or where winters are really severe garam masala is used liberally as the spices in it are very useful in combating cold. Garam masala adds a unique flavor to the food. In Indian cuisine especially North Indian Cuisine garam masala powder is used quite often. In market one would find garam masala having different composition. But the flavor is never like authentic garam masala. The marketed garam masala is loaded with red chili powder thus making it hot but I found the main ingredients missing.  Garam masala should be having flavor of all spices. I believe in making all spices powder myself as the purity is assured.

Preparation Time: 5 min.

Making Time: 30 min.

Servings: Makes 150-200 gm. Garam masala(Approximately)

Ingredients Required For Making Garam Masala:
  • 100gm. Coriander Seeds
Dhaniya (Coriander seeds)
  • 50 gm. Cumin Seeds
Jeera (Cumin Seeds)
  • 5 gm. Cloves (10-15 cloves)
Cloves
  • 5 gm. Cinnamon
Cinnamon
  • 3-4 Petals of Star Aniseed
Star Aniseed
  • 4-5 Black Cardamom
Black Cardamom
  • 4-5 Green Cardamom
Green Cardamom
  • 5 gm. Black pepper
Kali Mirch (Black Pepper)
  • 1/2Teaspoon Fenugreek Seeds (Methi Dana) (Optional)
  • 4-5 Bay Leaves (Tej Patta)
Bay Leaves
  • 1/2 Teaspoon Carom Seeds (Ajwain)
Ajwain (Carom Seeds)
  • 1/2 cm. piece of Nutmeg (Jaiphal)
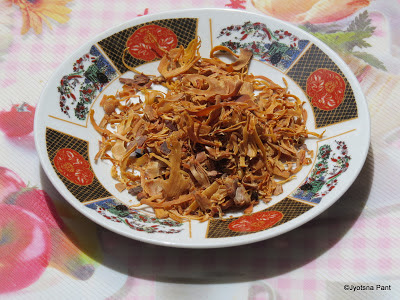
Nut Meg
  • 1 Tea spoon dried flowers of Nutmeg (Javitri)
Javitri (Petals of Nut Meg)
  • 50 gm. Whole Red Chili
  • 10  gm. Dry Ginger (Optional)
Directions For Making Garam Masala:
  • Remove the stalk and seeds from red chilies.
  • Keep cleaned red chilies under the sun for 2-3 hrs. to remove all moisture.
  • Clean coriander seeds and Cumin seeds.
  • Heat a thick bottom wok and roast coriander seeds on low flame with continuous stirring till light brown.
  • Remove the roasted coriander seeds and keep aside for cooling.
Roasted coriander seeds
  • Roast cumin seeds till they splutter and become very light brown.
  • Remove the roasted cumin seeds and keep aside for cooling.
Roasted Cumin Seeds
  • Roast cloves, pepper, cinnamon and bay leaves all together for 1-2 min. on low flame.
  • Remove the roasted spices and keep aside for cooling.
  • Pound the black and green cardamom and roast on low flame for 2-3 min.
  • Remove and allow them to cool.
  • Roast fenugreek seed till pinkish – brown.
  • Remove the roasted fenugreek seeds and keep aside for cooling. 
  • Roast cleaned, de seeded whole red chili on low flame till they attain a reddish- brown color. The whole red chilies will become crisp.
  • Remove the roasted whole red chilies and allow them to cool.
Roasted Pepper, Red chilies,Clove, Green Cardamom with Cinnamon stick and Bay leaves
  • Pound the dry ginger to very small pieces.
  • Grate nutmeg.
  • Take all roasted and cooled spices, pounded dry ginger, grated nutmeg, Nutmeg flower petals (Javitri) in a grinder and grind to fine powder.
  • Sieve the powder and store in a dry glass bottle / airtight container / Zip pouch.
Garam Masala
  • Do not throw the course particles left after sieving. They can be added to the Chole / rajma / Black horse gram (Kala chana) while they are being boiled or ground to paste with water and added to mutton / chicken along with onion-garlic masala.
Coarse particles left after sieving the garam masala powder
Tips:
  •  Do not add amchur (Powder of dry raw mango) because when added to curry it will impart sour taste even if not require in that food.
  • While the roasted spices are being cooled, the heat in them will cause the spices to change the color a shade darker.
  • Do not add amchur (dry mango powder) to the garam masala, because what you are cooking may require garam masala but not amchur.
  • Add garam masala always at the end, cover and leave for 5 min. for the flavor of masala to seep in the food completely.
  • If the red chilies are too hot then reduce the amount accordingly. It is best to add fewer chilies than make the masala too hot with red chilies.
  • Pepper and cloves are strong spices and their taste is hot. The spiciness of garam masala should come from them not red chilies alone.
  • Make sure that cumin is roasted to a state where the seeds just splutter and gain light color. If roasted to very dark color the flavor and color of garam masala will not be too great.
  • Different varieties of coriander seeds are available in the market, the color of which ranges from light green, yellowish green to brownish green. So while roasting make sure the color has changed to a shade darker and the seeds have become crisp.
  • While making powder of roasted spices after sieving once, grind and sieve the coarse particle again and again till no more powder is being formed. Then mix all powder and store.
Suggested Variations:
  • If you want the garam masala to be more spicy and hot increase the amount of black pepper and cloves to 10 gm. each. 
  • 50 gm. Kashmiri mirch (The fat red dry chilies from Kashmir which impart red color and flavor but no hot spiciness to the food) can be cleaned roasted and added to the slices before making the powder; This will make the garam masala reddish in color rather than brown.

LinkWithin

Related Posts Plugin for WordPress, Blogger...