Showing posts with label Appetizers. Show all posts

Monday, 19 August 2013

Veg Cutlets(Cutlets of leftover vegetables)


Clearance Cutlets

Clearance sale is most sort after by ladies because they can shop to their heart content without husbands cribbing too much. One day I was talking to my daughter-in –laws mother and she told she has made clearance dosa. I was intrigued by such name for the dosa and wanted to learn it from her. She laughed and said Mrs. Pant this name is given by me only and I call it so because whatever dals are left at the end of month I add to the remaining boiled rice and make dosa from it thus clearance before bringing groceries takes place and so Clearance Dosa!. I got the idea for naming these cutlets from her and thus came the name Clearance Cutlets. As the name suggests whatever vegetables are left in fridge and the old bread all is used in these cutlets. Wonderful use for the vegetables which we do not want to repeat again in next meal is converting them to Clearance Cutlets. I make it for breakfast with burger buns, for snacks I serve them with onion rings and chutney.

Preparation Time:5-10 min.
Cooking Time: 30 min
Servings: 6-8 Clearance Cutlets

Ingredients Required For Making Clearance Cutlets:
  • 2-3 Large serving of Left over vegetables
  • 4-5 Bread pieces
  • 1 Teaspoon Garam masala
  • 1-2 Green chilies
  • 1-2 cm. Ginger Piece
  • 2-3 Sprigs of Fresh Coriander leafs (Cilantro)
  • Salt to taste
  • 2 ml. Olive oil / cooking oil (optional)

Direction For Making Clearance Cutlets:
  • Wash drain and cut Coriander sprigs.
  • Grate ginger.
  • Remove seeds from green chilies and cut fine.
  • Dry all the liquid of the vegetables if they have curry.
  • Mash the left over vegetables nicely.
Left Over Vegetables
Mashed Left Over Vegetables
  • Crush the bread slices and make nice crumbs from it.
Bread Crumbs
  • In a bowl Take
    • Mashed Vegetable
    • Bread crumbs
    • Finely cut chilies
    • Grated ginger
    • Finely cut coriander (Cilantro)
    • Garam masala
    • Salt
  • Mix nicely to make uniform mixture for cutlets
Mixture for Clearance Cutlets
  • Divide the mixture to 6-8 parts.
  • Make round ball from each ball and flatten by pressing between your palms.
  • Heat a Tawa (Iron plate) / Pan and place the flattened balls on the tawa/pan.
Clearance cutlets on the Tawa
  • Cook till the side touching the tawa gets golden brown color.
Cutlets Cooked On One Side

  • Turn upside down and cook the other side also till it becomes brown.
Clearance Cutlets

  • If you want 1 ml oil can be sprinkled on each side and shallow fried for 1 min. on each side. (Optional)
  • Serve hot with chutney and onion rings for snack.
Clearance Cutlets Served With Coriander-Mint Chutney and Onion Rings
  • Cut a burger bun apply chutney on one side of the bun, Apply butter on the other side of the bun. Place salad leaf on the side with chutney, place the cutlet on the salad leaf, spread some tomato sauce and place one salad leaf on the top of sauce. Put the butter side bun on the top of all and hold them by a long tooth pick. Vegetarian, healthy, least oily Burger is ready.
Tips:
  • Since salt is there in vegetables, therefore taste before adding salt to the cutlet mixture.
  • Vegetables with gravy / Rajma /Chole also can be used, but only after their gravy has been dried completely.Mashed rajma, chole (Chick peas), kala chana (Black gram taste wonderful in these cutlets.
  • Oil is not required at all to make these cutlets as oil of cooked vegetables is sufficient.
  • The tawa / Pan which is used should be thick otherwise cutlets will burn and not get cooked nicely.
  • Always use non-stick vessels for cooking oil requirement reduces many folds.
Suggested Variations:
  • If bread is not there but vegetables are left in fridge / from previous meal then do not rush to get bread. Wash 1 tea cup (150 ml.) poha crush nicely and use instead of bread. You will have to knead nicely.
  • Corn flour / Rice flour can be used instead of bread.
  • Finely cut celery / parsley can be added instead of coriander.
  • One medium size finely cut onion can be added to the cutlet mixture. (3/4 Teacup cut onion).

Monday, 5 August 2013

Paneer-Dahi-Tikka(Paneer Marinated In curd and Barbecued)


Paneer-Dahi Tikka Skewer on the Barbecue
Paneer or cottage cheese is similar to the    cheese. Paneer makes a wonderful starter/appetizer/main course snack. In my house if there is a party then paneer as appetizer as well one vegetarian dish as main course is a must else the meal as grand as it may be would be incomplete for my family members. Paneer tikka made on non-stick tawa/ pan is very easy to make but barbecued paneer is the best. Changing the marination of the paneer make tremendous difference in the taste and flavor of the Tikka. Paneer Dahi Tikka is oil less and very easy to make but extremely tasty.

Preparation Time: 45-50 min. (Marination time included)
Cooking Time: 5-10 min / Skewer
Servings: 6 Medium Servings

Ingredients Required For Making Paneer-Dahi-Tikka:
  • 250 gm. Paneer (Cottage cheese/Ricotta cheese)
  • 100 gm. Thick Fresh Curd
  • 50 gm. Cream (Optional)
  • 1/4Teaspoon Coriander Powder
  • 1/2Teaspoon Red Chili powder
  • 1/4Teaspoon garam Masala
  • 1 Teaspoon Garlic paste (Optional)
  • 1 Teaspoon ginger past.
Ingredients of Marinade for Paneer-Dahi-Tikka
  • Different color bell pepper
  • Salt to taste
Direction For Making Paneer-Dahi –Tikka:
  • Cut paneer to 3-4 cm. Cubes.
  • Take
    • Curd
    • Garlic paste
    • Ginger paste
    • Salt
    • Garam masala
    • Dhaniya powder
    • Red chili Powder
    • Cream and beat nicely to make thick, creamy, marinade for Paneer-dahi-tikka.
Spices in cream and curd mixture for making Marinade
Marinade for Paneer-Dahi Tikka
  • Dip each paneer piece carefully in the Curdy-Creamy-Marinade and keep in a bowl.
  • Pour the remaining marinade on the paneer pieces.
Paneer in Marinade
  • Cover and keep for marinating for 30 min.
  • Cut the pepperoni to 3-4 cm. cubes after removing the seeds.
  • Skewer the marinated pepperoni first and then paneer piece. Alternate the paneer and bell pepper pieces.
Marinated Paneer and Yellow Bell Pepper In Skewer
  • Each Bell pepper-Paneer pair should be 1 cm. apart from the other Paneer-pepperoni pair.
  • Keep the skewer with paneer on the red hot charcoal barbecue and keep turning regularly to make sure that all side of paneer get cooked uniformly.
Tips:
  • Do not cut the paneer pieces small and thin else they will break while skewering or fall off while barbecuing.
  • Never keep the skewer directly on charcoal they should be kept above the charcoal not on it.
  • Remember when it is garlic paste and ginger paste then take as said in recipe. Do not change it to garlic-Ginger paste, else the taste will change.
Suggested variations:
  • Par boiled cauliflower can be skewered along with bell pepper.
  • Barbecued tomato pieces taste great with Paneer-Dahi-Tikka so thick pieces of fleshy tomatoes can be skewered along with Pepperoni.
  • Cherry tomatoes can be skewered after giving them a prick with tooth pick.
  • Those who do not wish to eat garlic can avoid garlic from marinade mixture.

Monday, 29 July 2013

Mushroom Dahi Tikka (Curdy-Creamy Barbecued Mushroom)


Mushroom Dahi Tikka (Barbecued Curdy-Creamy Mushrooms)
In a star lit night, sprawled on a mat getting  the wafting smell of mushroom and paneer being barbecued made me get up and check what my son was doing thus breaking my promise that I would not get up till I was served the food. I love the smoky taste of vegetables / chicken / fish / mutton cooked on charcoal. We call them paneer / mushroom/ chicken/mutton/fish Tikka. With Red wine and garlic bread mushroom and paneer tikka make healthy, non-oily delicious and complete food. I do not like overpowering the delicate flavor of mushroom with any strong sauce.Charcoal barbecue apparatus can be purchased  for using indoor and of course out for picnic, just carry raw material and some charcoal, stop when hungry,  look for four big stones they will make the perfect barbecue pit.

Preparation Time: 30 min.
Cooking Time 30 min
Servings: 8 large servings

Ingredients Required For Mushroom Tikka:
  • 500 gm. Button Mushroom
Mushrooms
  • 200 gm. Thick curd
Thick Curd
  • 1 tea spoon Cream (Optional)
Cream
  • 1/2Teaspoon Red Chili Powder
  • 1 Tea spoon garlic paste
Garlic Paste
  • 1 Tea spoon Ginger paste
Ginger Paste
  • 1 tea spoon Coriander Powder
  • Salt to taste
Directions For Making Mushroom Tikka:
  • Soak Mushrooms in water for 10 min to remove all dirt sticking to the surface.
  • Towel dry the washed mushrooms.
  •  In a big bowl mix
    • Thick curd
    • Garlic paste
    • Ginger paste
    • Red chili powder
    • Coriander powder
    • Cream (Optional)
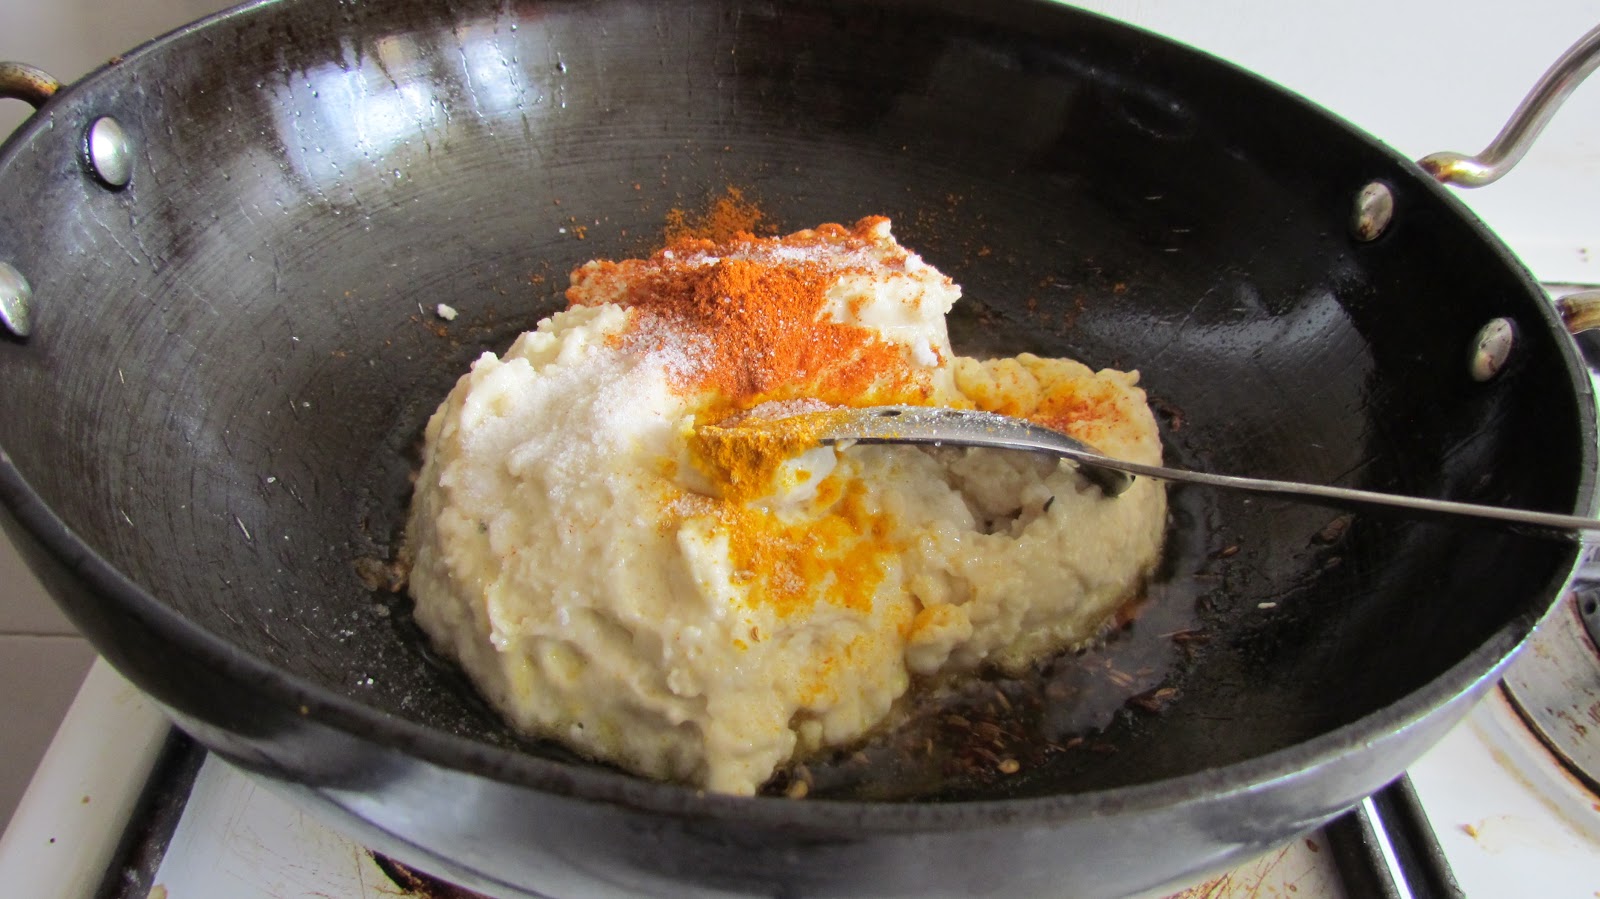
  • Mix all ingredients nicely till smooth and homogenous mixture is made. Marinade for Curdy barbecued mushroom is ready.
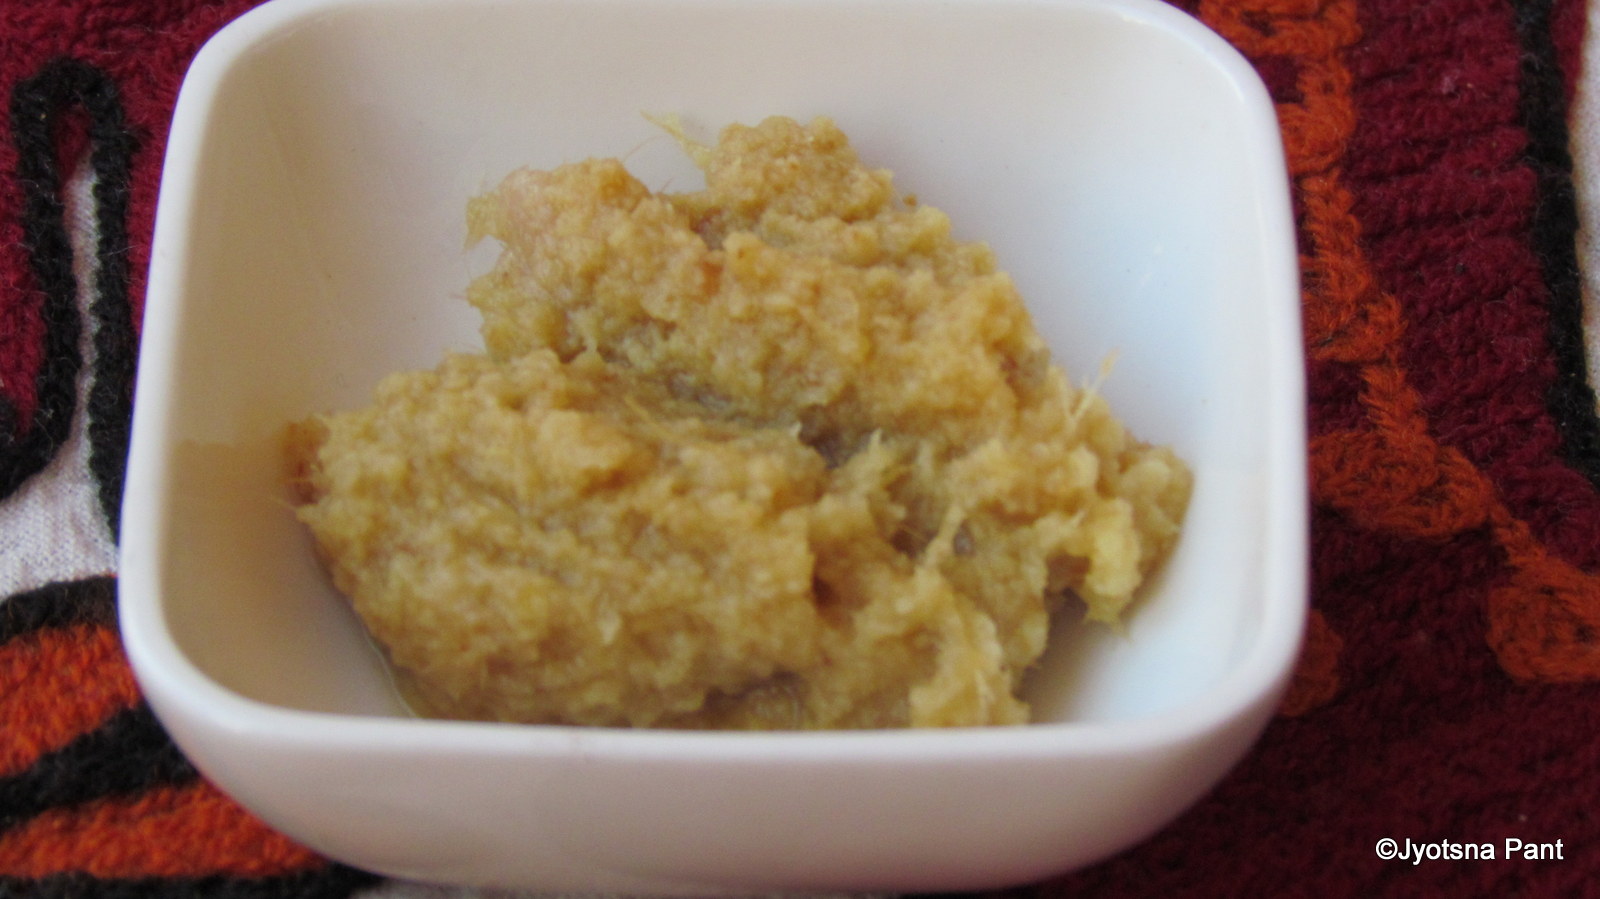
Marinade for Mushrooms
  • Dip each cleaned and dry mushroom in the marinade and carefully keep in a bowl. Repeat the same with all mushrooms.
  • Pour the remaining marinade on the top of mushrooms.
  • Cover and keep for 10-15 min.
Mushrooms marinated in curd marinade
  • Take a clean skewer and carefully put the marinated mushrooms on the skewer, entering the skewer from stalk and exiting from head of the mushroom.
Marinated Mushrooms on skewer before being barbecued
  • Make sure there is at least one centimeter space between two mushrooms.
  • Place the skewer with marinated mushrooms above the red hot charcoal and let them cook till they start getting tender. Keep turning the skewer with mushrooms on the charcoal to ensure uniform cooking.
Skewer with marinated mushrooms being barbecued on hot amber 
  • It will take not more than 3-4 min for one skewer mushrooms to get barbecued.
Mushrooms barbecue
  • Remove hot barbecued mushrooms from skewer and serve piping hot with coriander mint chutney and chilled wine.
Mushroom Dahi Tikka (Curdy-Creamy Barbecued Mushroom)
To enjoy the heavenly taste of Mushroom Dahi Tikka to the fullest avoid strongly flavored spicy sauces with Curdy-Creamy Mushroom.
 Tips:
  • Bigger the size of mushrooms better the final result as big size mushrooms are easy to skewer and barbecue.
  • To avoid juices of mushrooms leeching during marinating,salt can be added to mushrooms after they have marinated just before skewering them.
  • Do not marinate the mushroom for longer time.
  • Do not barbecue the mushroom for too long they will lose the juices and will become chewy.
  • Delicate and careful handling of mushroom is a must else they will break while skewering.
  • Always serve piping hot. Do not barbecue and keep for later use as reheating will make the mushrooms go limp, chewy and the taste will not be good.
Suggested variations:
  • 2 cm. pieces pf capsicum, red and yellow pepperoni (Bell pepper) can be marinated with mushrooms,skewered between two mushrooms and then barbecued.
  • If you like smokier flavor then burn a piece of wood with charcoal just before keeping the skewer with mushrooms on the charcoal.
  • Just before taking the cooked mushrooms from barbecue sprinkle some herb of your choice on the charcoal and let the mushrooms absorb the flavor for 20-30 seconds, then remove them from barbecue. The wonderful smell of herbs will seep into barbecued mushrooms.

Thursday, 13 October 2011

Kachori / कचौड़ी (Stuffed and fried Indian Bread)


Kachori
In Uttar Pradesh, India, when winter is approaching in the morning market is full of aroma of Kachories and Jalebies because that is the one thing most people come to the market braving the chill of winters,as hot Kachori and hot Jalebi make a perfect combination for brunch. High on calories, but then once in a while indulging is not bad. So do I, and do penance later on by eating low calorie food for few days. Make now and I assure you, you and your family will get hooked to it !


Preparation time: 20 min.
Cooking time: 30min.
Servings: Total kachori made from above material 8 - 10.

Ingredients required for outer cover of Kachori:
  • 250 gm .Maida(refined wheat flour).
Maida(Refined flour)
  • 50 gm. Clarified butter ( Ghee) 
Ghee(Clarified butter)
  • 1/2Tea spoon Salt 
  • Water. 
Ingredients Required For Filling:
  • 150 gm . Urad dal.
  • 1 Tea spoon Garam masala.
  • 1 Tea spoon Amchur (dry raw mango powder).
  • 1 Tea spoon Red chilly powder.
  • 1 Tea spoon finely cut green chillies/or red chillies broken to pieces
  • 1 Tea spoon grated Ginger
  • 1 Tea spoon Saunf 
  • 1/2 Tea spoon Turmeric powder.
  • Salt to taste.
  • 1 Tea spoon Sugar powder.
  • 1 Tea spoon Cumin seeds.
  • 1/4 Tea spoon Asafoetida(Hing) powder.
  • Cooking oil for frying.
   Direction to Make Kachori Dough:
  • Take maida in a bowl and add salt and ghee to it and mix till it resembles bread crumb.
Maida after mixing Ghee
  • Add water in small proportions and knead.
  • Knead till the dough is soft but firm.
  • Cover and keep the dough aside
Dough for Kachori
Direction To Make Kachori Filling:
  •  Soak the dal for 4-5 hrs.
  • Drain water from dal and grind it coarsely.
Soaked Coarsely ground Urd dal
  • Keep a wok on gas and put 15 - 20 ml. of oil in it and heat 
  • Add cumin seed and saunf (Anni seeds) when hot and let them split.
  • Add green chilies/red chilli, ginger, saunf,asafoetida and cook for 1min.
Cumin seeds, saunf, red chilli, hing in oil
  • Add the coarsely ground dal, salt , turmeric powder, red chilli powder, amchur and mix thoroughly.
Dal, red chilli powder, salt, haldi amchur added 
After mixing
  • Cover and cook for 2 min. 

Being cooked after mixing.
  • Remove the lid and scrap the mixture which is stuck to the bottom of the wok and mix nicely, add sugar and mix.
Sugar added and mixed
  • Cook for 2-3 min. more with regular mix.
  • Remove from gas.
  • Cover and let it cool.
Filling ready

Direction To Make Kachori:
  • Make small balls of the dough ( 8 - 10 will be made from 250 gm. maida.)
Ball of flour for Kachori
  • Press them flat by pressing them on your palm and make it of cup shape.
Ball of flour made to the shape of cup to fill the filling

  •  Fill them with the filling.
Filling in the flour
  • Press the edges so that the filled ball is sealed properly.
Closing the ball after filling
closed ball with filling
  • Press it gently to flatten it up to 5 cm. diameter round.
Filled ball flattened to make Kachori
  • Heat oil in a wok and when the oil becomes smoking hot
Kachori being fried

  • Bring the flame to low and fry the filled Kachori one by one with occasional turning till golden brown on both sides.
Fried Kachori ready to be taken out
  • Hot delicious Kachoris are ready to be enjoyed with  sweet tamarind chutney
    http://jyotsna-pant.blogspot.com/2011/10/sweet-tamarind-chutney.html
    green chutney
    http://jyotsna-pant.blogspot.com/2011/10/green-coriander-and-mint-chutney.html
    and thick curd.
Kachori ready to be served

Tips:
  • The filling and dough can be prepared and kept in fridge for 7-10 days.
  • Do not grind dal to fine paste.
  • Frying should always be done on low flame to get best result.
Suggested Variations:
  •  Finely cut coriander leaves can be added to the filling mixture.
  • Raisins, cashew nut can be added to the filling mixture.
  • Moong dal can be taken instead of urd dal.
  • 10-20 gm. Suji can be added to the maida before kneading.  

    LinkWithin

    Related Posts Plugin for WordPress, Blogger...